How to Change a Value in Custom Fields
The Overwrite Invitations feature lets you update or correct custom fields linked to respondents after invitations have already been sent.
You can use it to:
- Fix incorrect data (e.g., wrong recruiter or hiring manager).
- Add missing information (e.g., job title, branch, or department).
💡 When You Might Need to Overwrite Invitations
Example 1 — Manual Invitations:
You uploaded a CSV file manually and forgot to include some details — for instance, your contact “Maria” isn’t linked to her department or job title. As a result, dashboard filters don’t work properly.
Example 2 — ATS Integration:
You send surveys automatically via an ATS, but the recruiter or coordinator info in your ATS was outdated. The wrong person was linked to the candidate.
In both cases, you can overwrite existing invitations to update or add the correct custom fields.
Important Notes
If you upload a new file without the same custom fields from your original file, you’ll lose that data.
You cannot edit the first three columns of the invitation file (First Name, Last Name, Email Address). These are locked fields and cannot be changed after the invitations are sent.
When overwriting, changes only apply to the contacts included in your new upload.
🧾 Overwriting Invitations for Manual Survey Sends
If you send invitations manually (via CSV upload), follow these steps:
Step 1. Prepare Your File
- Open the original invitation file in Google Sheets, Excel, or similar.
- Add or update the missing custom field(s).
- For example, add a new column Department or correct a value in Recruiter.
- Save your file again in .CSV format.
Step 2. Upload the Updated File in Starred
- Log into Starred and find the survey you want to update.
- Click ⋮ (menu) → See all invitations.
- Locate the correct invitation batch.
- Use the date/time and email addresses to confirm you have the right one.
📸 Example:
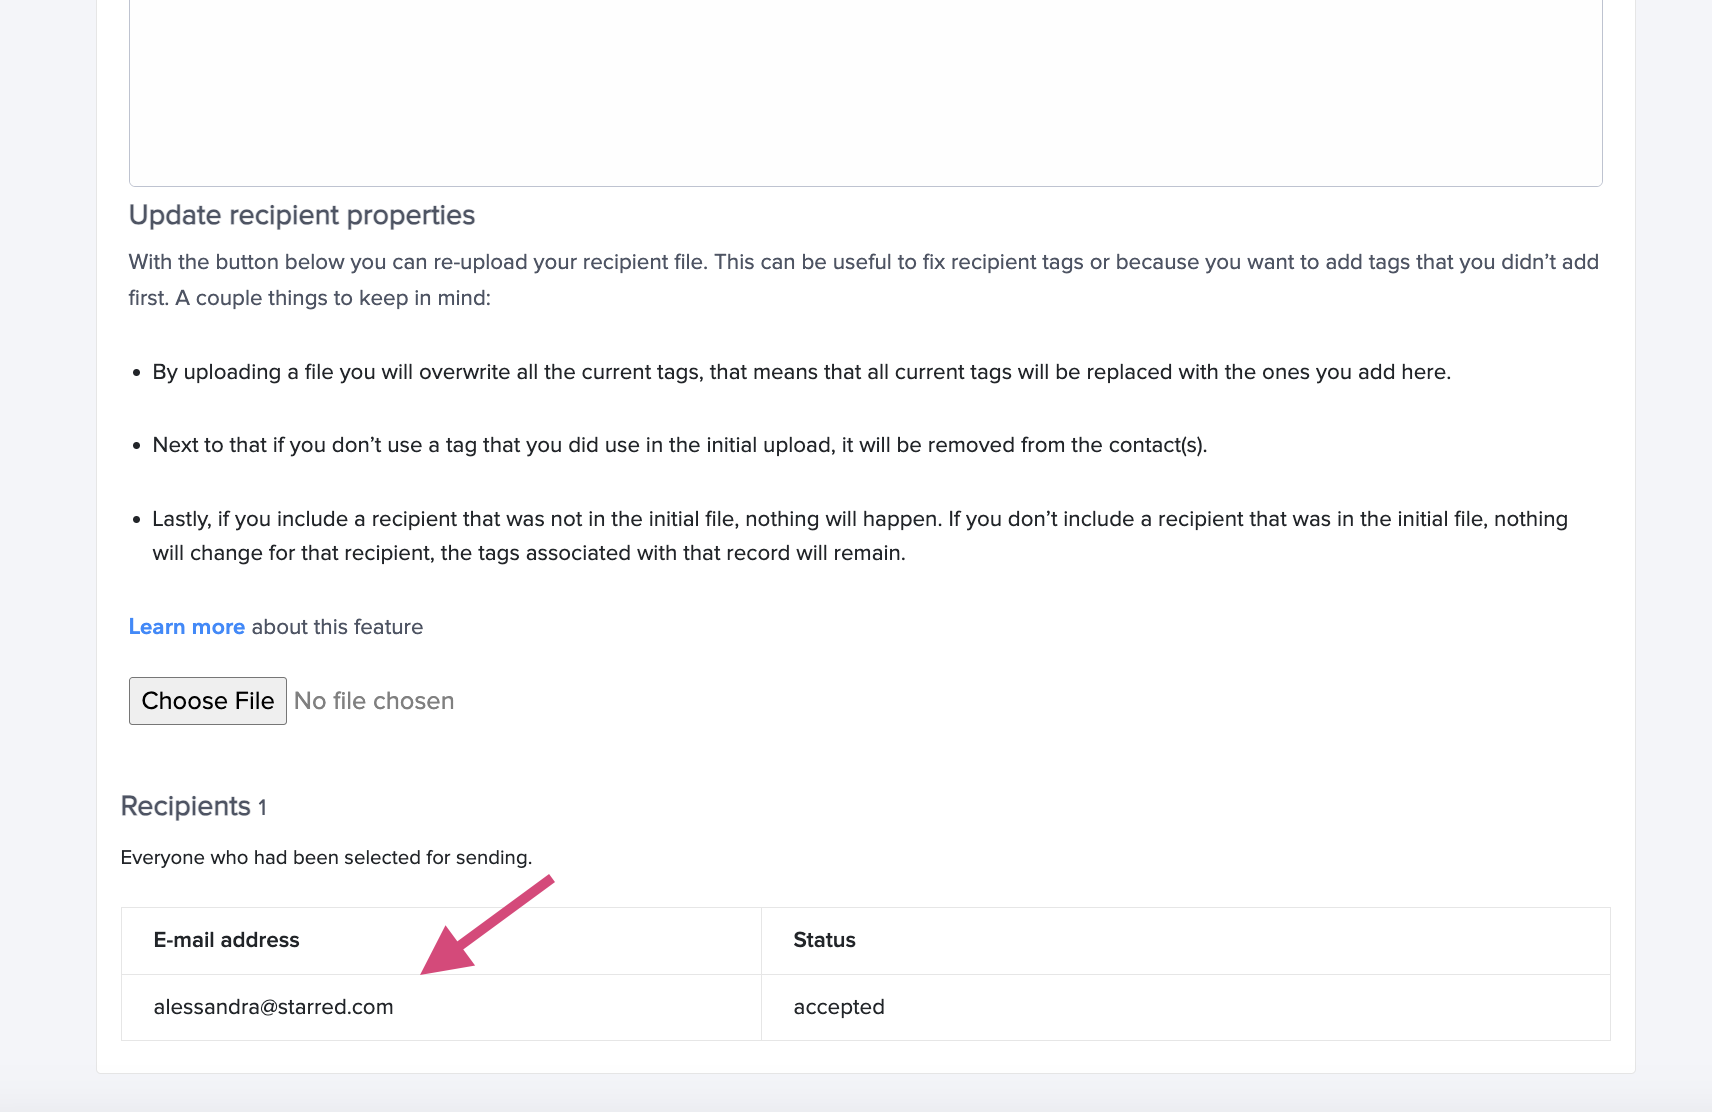
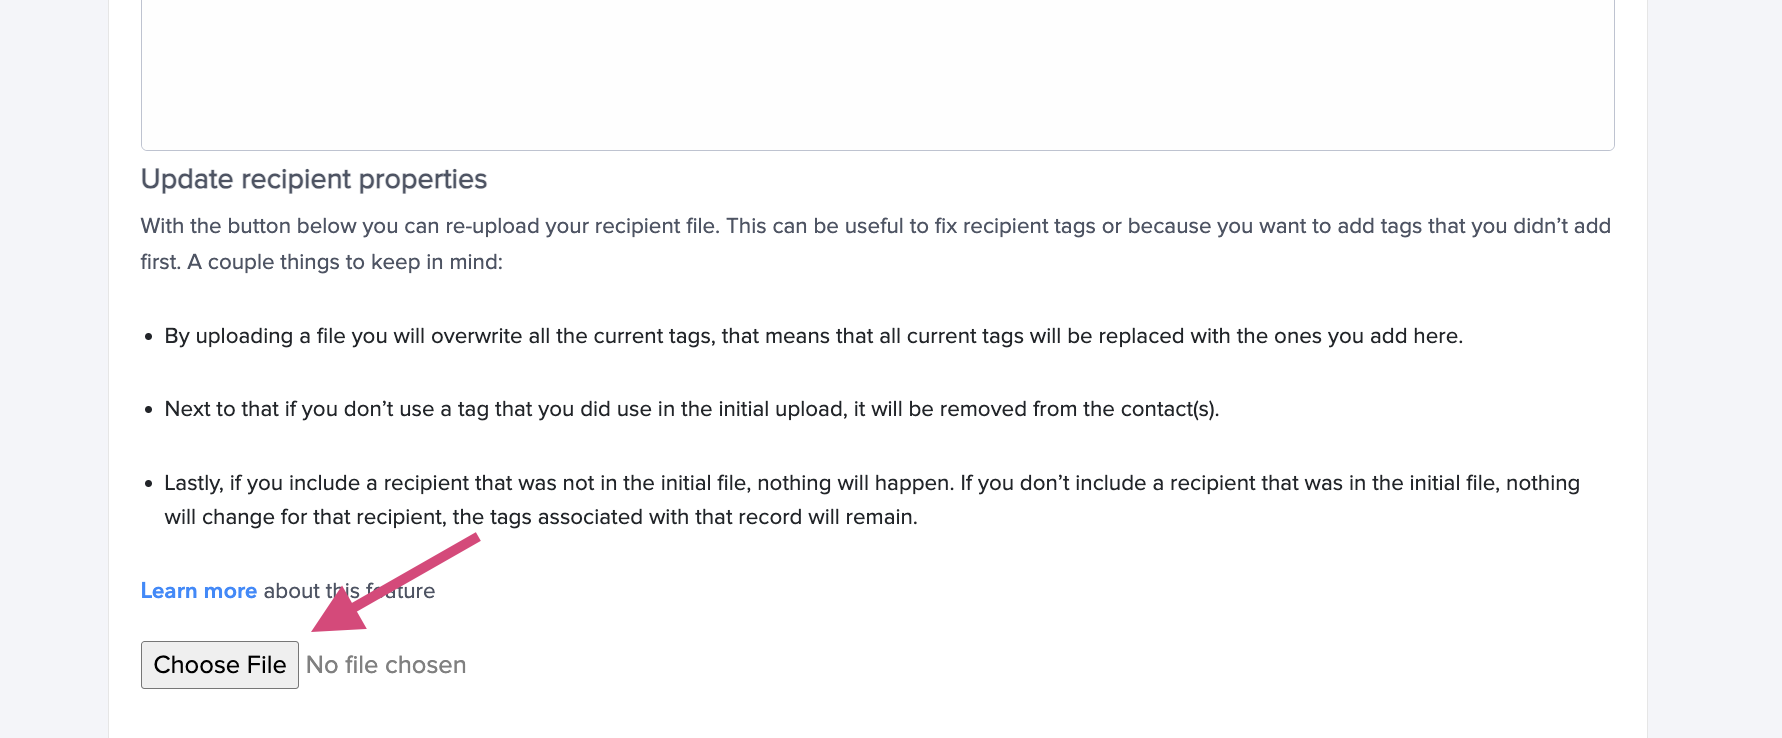
- Scroll to the section Update recipient properties.
- Click Choose file, then upload your updated .CSV file.
📸 Example:

✅ The custom fields will be updated.
Changes may take up to two hours to appear in your dashboard.
⚙️ Overwriting Invitations for Automated (ATS) Surveys
When surveys are sent automatically through an integration (e.g., Greenhouse), the process differs slightly. You’ll need to work from an exported responses file, since there’s no original CSV.
Step 1. Export Survey Responses
- In Starred, export your survey responses.
- Apply filters by date if needed — this keeps your export smaller.
📸 Example

Step 2. Clean Your Export File
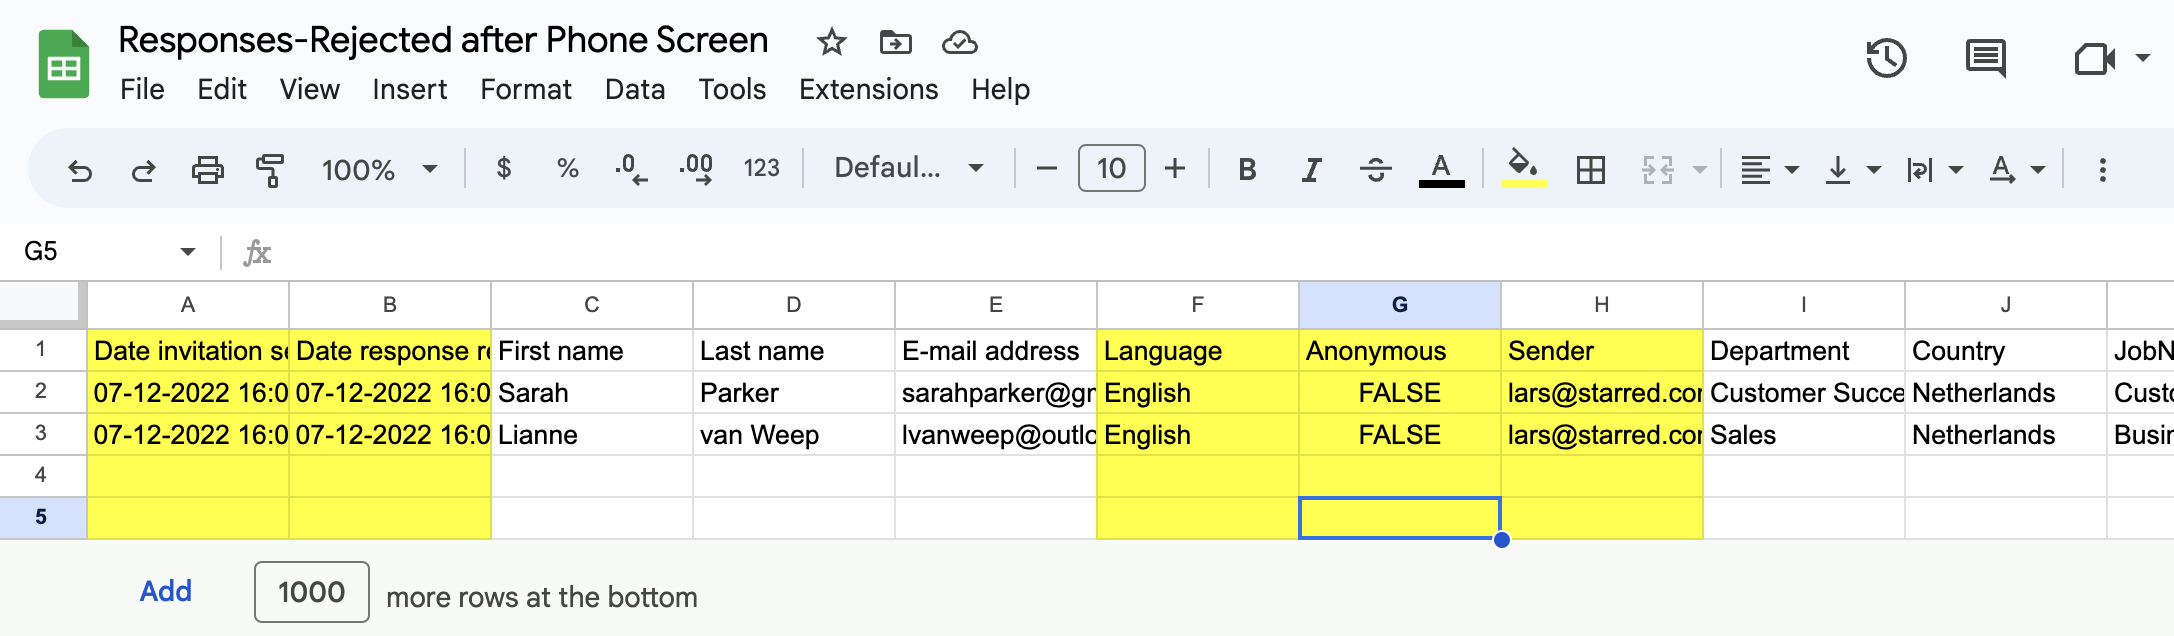
Before uploading, remove fields that Starred automatically adds to response exports — these don’t belong in invitation files.
Delete columns like:
- Date invitation sent
- Date response received
- Language
- Anonymous
- Sender
- Time to process
📸 Example:
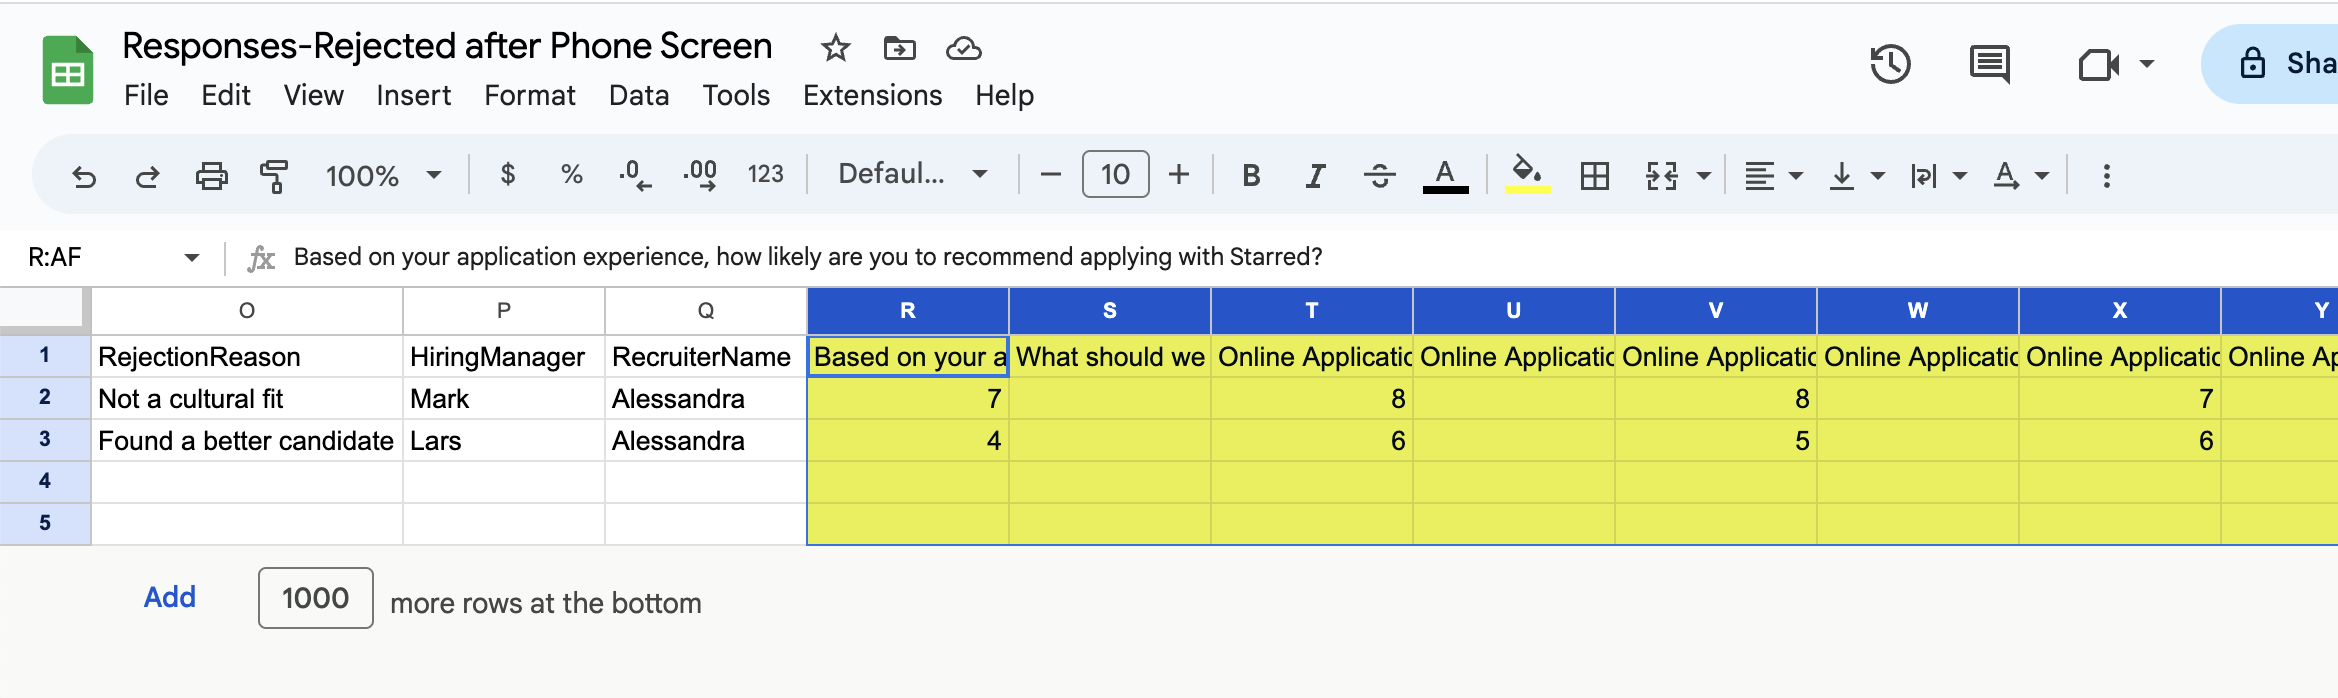
Then, scroll to the right and delete the response and response link columns.
⚠️ If you leave these columns in, Starred will treat them as new custom fields, cluttering your dashboard filters.
Step 3. Update and Re-Upload
- Add or correct your custom field values (e.g., recruiter, hiring manager, location).
- Save the file in .CSV format.
- In Starred, go to the survey’s invitations overview.
- Find the correct batch (based on date/time or respondent email).
- Under Update recipient properties, click Choose file and upload your cleaned CSV.
📸 Example:
✅ The custom fields will be updated.
Changes may take up to two hours to appear in your dashboard.
⚠️ Additional Note for Anonymous Surveys
If your survey is anonymous, you’ll need to re-add candidates’ names and email addresses when overwriting invitations. Starred requires an email address to link updated invitations to existing responses. Without these, the upload won’t work.
Summary
| Step | Method | Key Actions |
|---|---|---|
| Manual invites | Use original CSV | Add/edit custom fields, re-upload via Update recipient properties |
| ATS integration | Export responses | Clean file, remove Starred-only fields, include name and email address for matching, re-upload via Update recipient properties |
Updated 9 months ago