How to use and save filters
How to get the most out of the dashboard by using filters
Filtering your dashboards allows you to get more specific insights. In Starred, you are able to choose which filters to apply and save ones you are using regularly.
Watch this short video to learn how to use and save filters in your dashboards. Otherwise, for a written guide, scroll down!
Please note
- This feature is only available to users with the access right "Can filter dashboards".
- Saved filters are only available for your specific user profile so you'll be the only one seeing your specific filter sets.
The filters that you’ll be able to use in your dashboard are either:
- Based on the custom fields you're assigning to your respondents (either through your workflows or when inviting manually via a CSV file)
- filters that Starred automatically adds to your respondents, mainly Date, Journey type, NPS Category, Source, Survey
To make filtering through the dashboard easy and efficient, Starred uses expressions and conditions.
Date filter
By default, when responses are received, they are assigned a specific response date. Starred uses this information to enable date filtering in your dashboard, allowing you to analyze your results over time.
Please noteThere are two different date filters available in all dashboards: the Invitation Date filter and the Response Date filter. You can learn more about the differences between these filters in this article.
Both “Date” filters work based on the following expressions:
- In: when you select the expression “in” with a Date filter, you’re able to choose between a few options such as last 30 days, last month, this quarter and so on.
- Is, Is before, Is after: when choosing these expressions, you’re able to view responses based on a specific date.
- Is between: use this condition if you want to see responses that have been sent between two specific dates. It's important to remember that the first date of the range is included, while the last date of the range isn't!
- Is empty, Is not empty: you won’t really use it with the “Date” filter as every response will be attached to a date, but this expression will be useful with other filters you might have.
If you want to learn how to filter results for the past month only, you can read more in this article.
Journey type and survey filters
Use these in role-based dashboards!With these two filters, you can filter out responses based on the journey type, to which the surveys are liked, or directly based on the survey.
This is useful when analyzing data from your role-based dashboards (only for Candidate Experience accounts!) or bespoke dashboards.
The main difference between filtering on journey type or survey is that more surveys could be linked to one journey type, so by selecting the journey type you're automatically selecting all surveys linked to that journey type.
For instance, you can filter to only see results from your candidates from the rejected after interview journey type, but you might have more surveys under the "interview" umbrella.
Thanks to Starred's filtering conditions, though, you can still select multiple surveys when using the survey filter.
NPS category
If you have included the NPS question in your survey, you can filter through your dashboard based on the NPS scores given by your respondents.
The NPS filter lets you select data relating to your Detractors, Passives and Promoters so you can have a better understanding of what the different respondent groups think of you.
Subject filter
With this one, you can choose which questions to analyze in your dashboard.
As an example, in your Recruiter Performance dashboard, which is part of your role-based dashboard, you can use the Subject filter to only view ratings for questions that relate to a recruiter's actual performance and exclude questions around aspects of your recruitment process that are not under the recruiter's responsibility.
An example of this would be filtering by subjects like "Screening", "Scheduling of Interviews" or "Feedback" and leaving out subjects like "Career Site" and "Job description".
Your company’s filters
If you have used custom fields (e.g. Department, RecruiterName, Location, etc.) when inviting your contacts, they can also be used as filters to dive deeper into the data.
These filters are based on the following expressions:
- Is any of: this will be your most used expression as it allows you to select several values from the list.
- Is not any of: it's the same as the previous one, but negative
- Contains, Does not contain: these two are useful if you need to filter on a few values within a field and they all contain the same word. Instead of ticking them all from the list, you can use this expression.
- Is empty, Is not empty: used less often, but useful when you need to filter through responses where a field might be empty or you want to make sure to filter through responses for which a certain field is for sure filled.
Please noteStarred will store your active filters up to a day. If within a day you return to the same dashboard (that includes also other views, such as the Comparison dashboard or the Priority Matrix), Starred will re-apply the same filters you had previously.
Saving filters
If you’re often using the same filters, Starred allows you to save them so you do not have to select them each time.
Once you've added your desired filters, a text will appear on the right-hand side which prompts you to create a saved filter:

You can then give it a name:

Once your filter is saved, it will appear in a dropdown menu on the left side. You can now deselect your filters and reapply your saved filter as desired.
Updating or deleting a saved filter
Once you have created a filter, you can still make changes to it later on, such as changing a name or adding an extra layer to it by adding another filter to the set.
You'll notice that once your filter is applied, the text on the right-hand side transforms from "create" to "update" saved filter:

- Changing the name: to change your filter name, click on Update saved filter, change the name and save
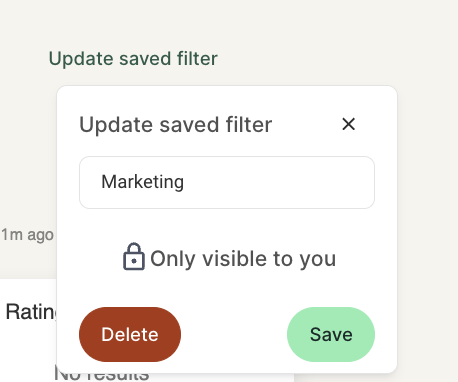
- Adding or removing a filter: select your desired one from the list. If you wish to remove a filter, click on the X next to it, then click on Update saved filter and save.
- Deleting a saved filter: to delete a saved filter, click on Update saved filter and then click on Delete:
Updated 9 months ago