Set up your Workday account

In order to enable the Workday / Starred integration, you first need to complete the below steps from your Workday environment:
- A. Create Integration System User
- B. Create Integration Security Group
- C. Create Report Definition
A. Create Integration System User
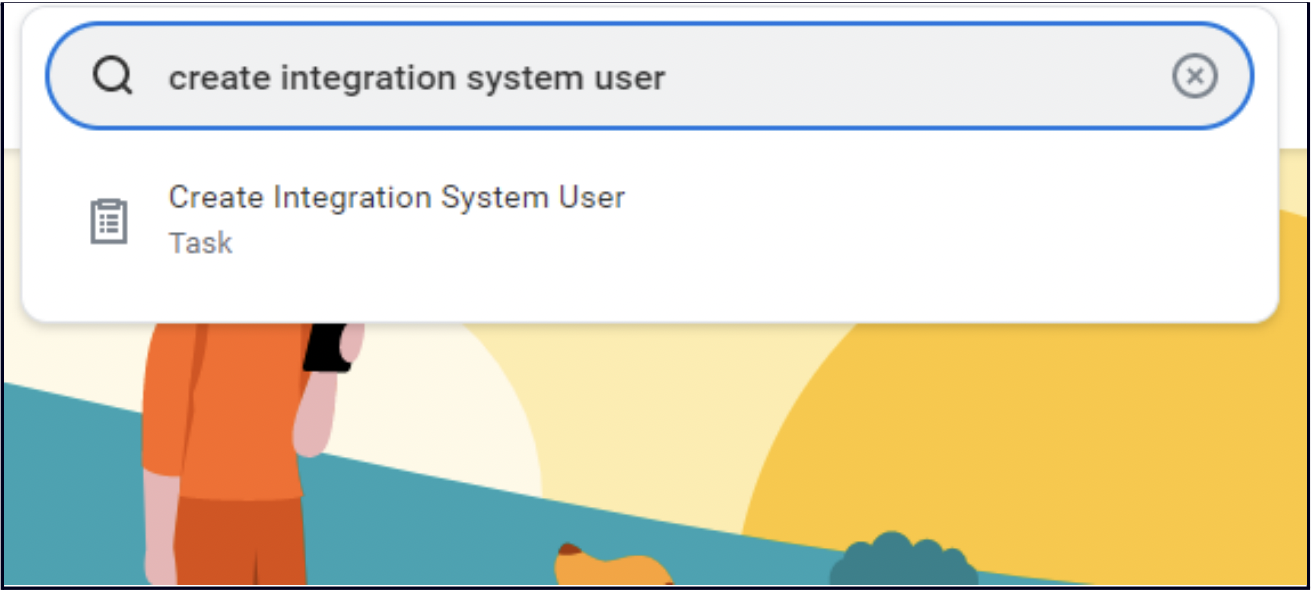
- Type “Create Integration System User” in the Search Box and select the option in the list.
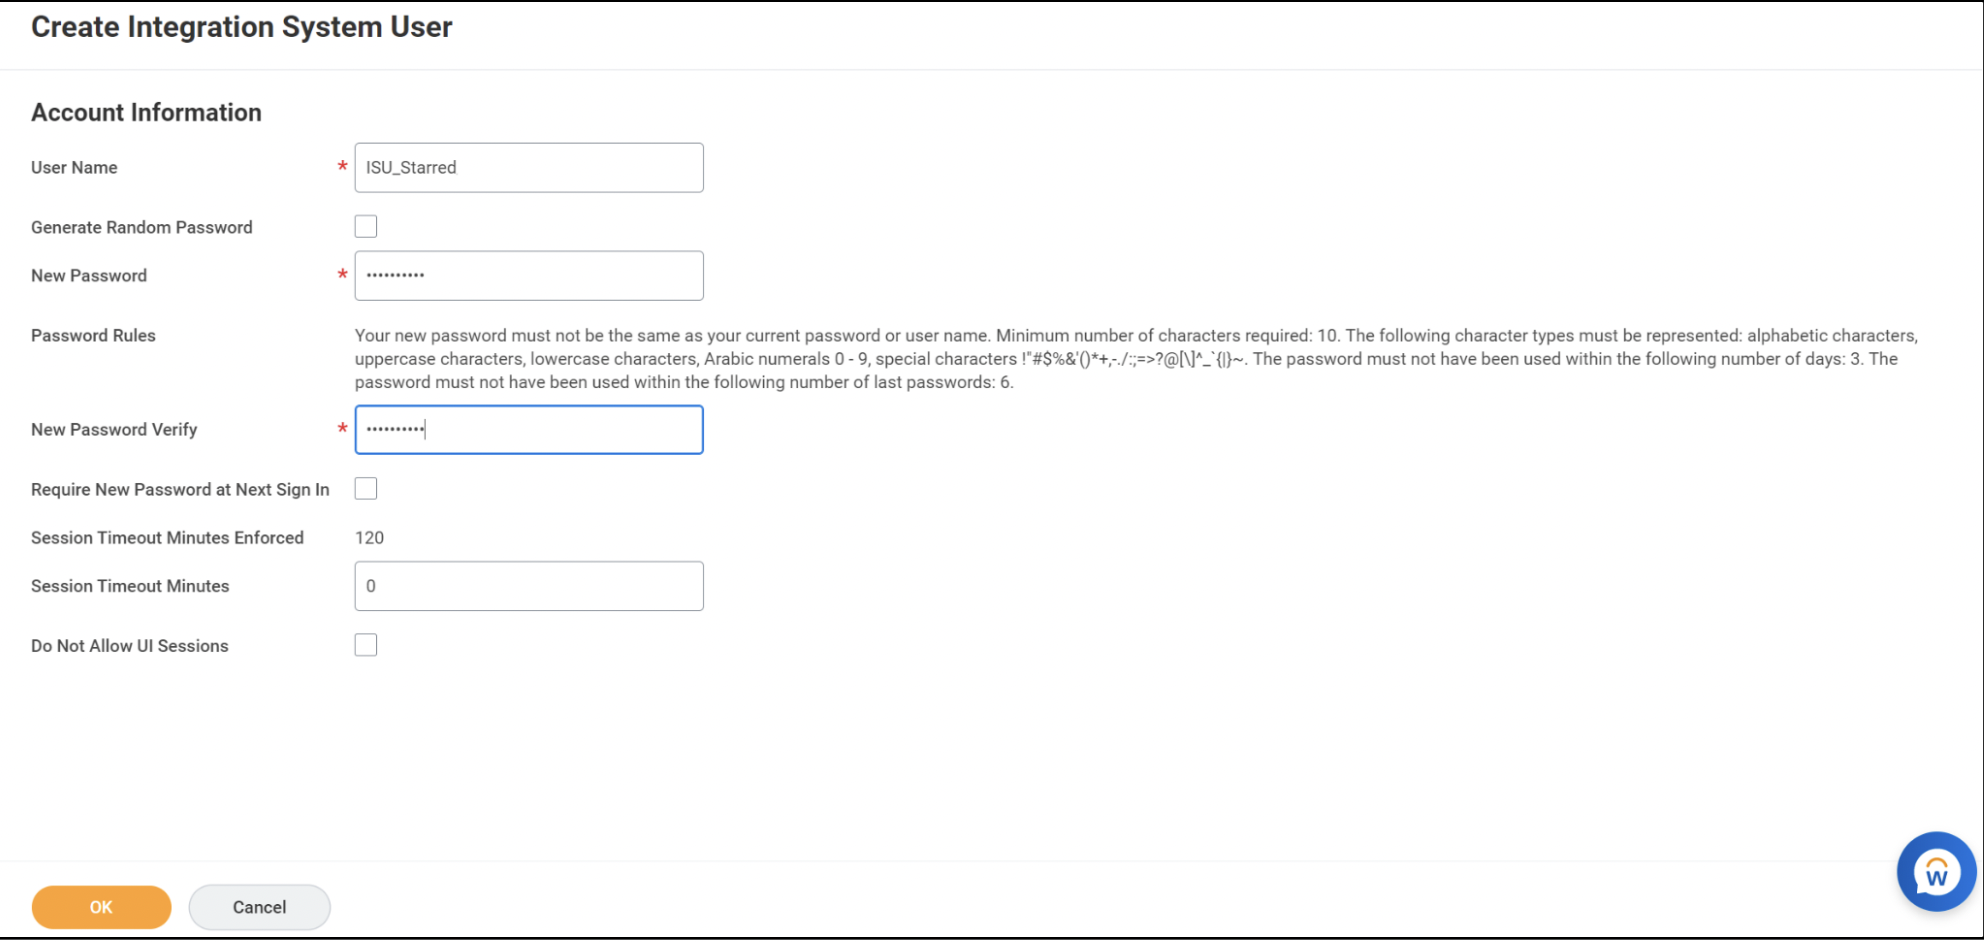
- Assign fields like User Name, New Password and New Password Verify. For the User
Name put 'ISU_Starred', and click OK.
Note down the username and password as these need to be shared with Starred.
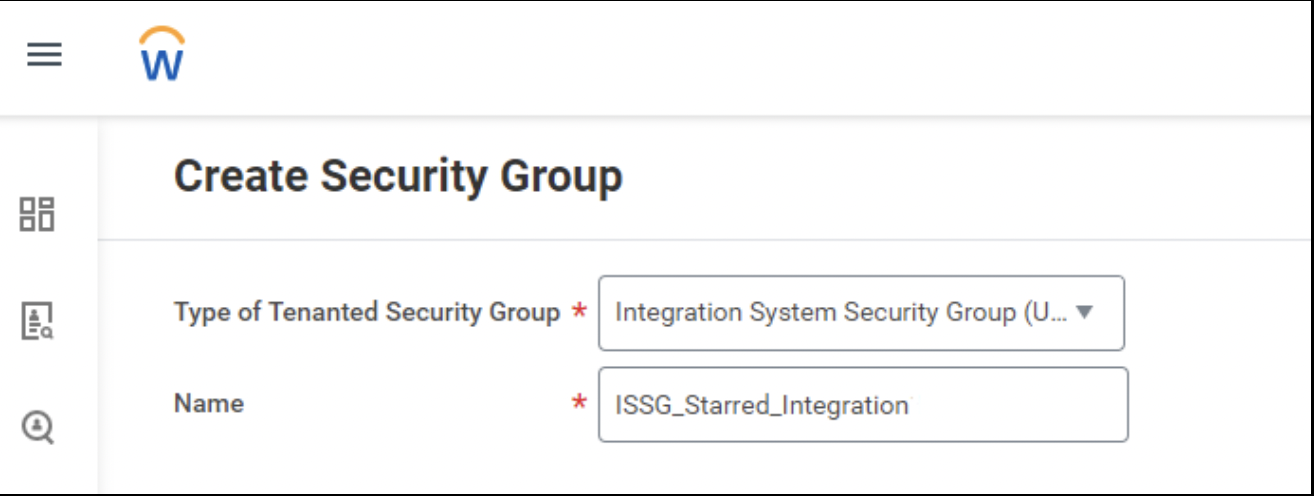
B. Create Integration Security Group
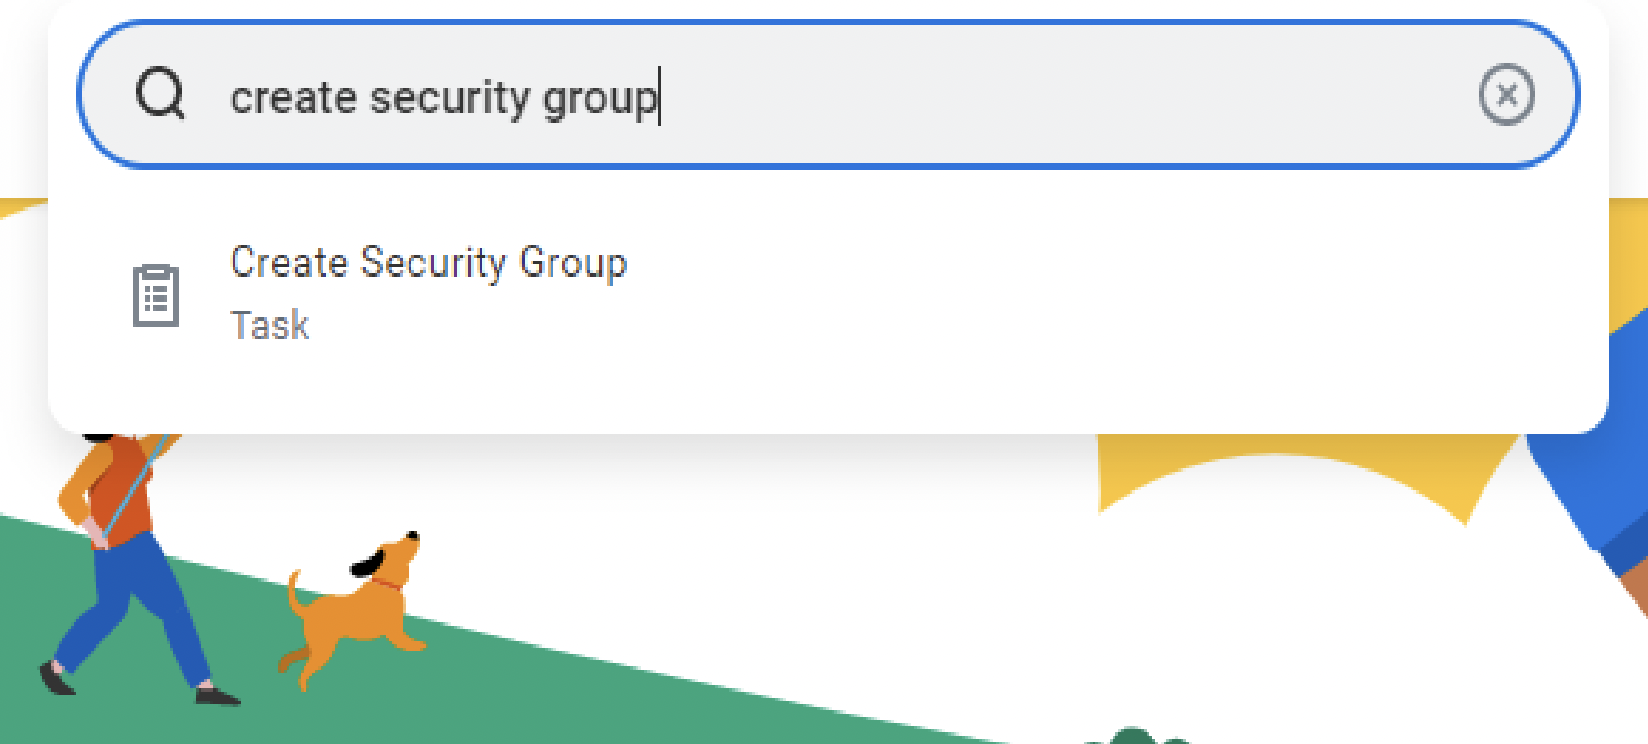
- Type “Create Security Group” in the Search Box andselect the option in the list.
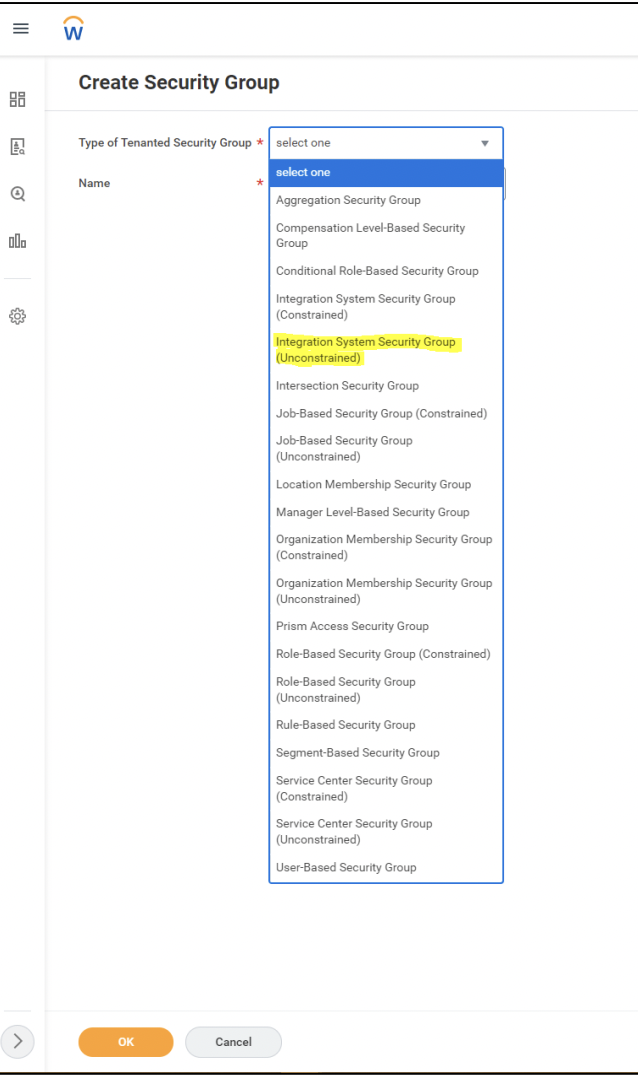
- For the option Type of Tenanted Security Group:
- Integration System Security Group (Unconstrained) from the drop-down list.
- For the option Name:
- type “ISSG Starred Integration”
- click OK.
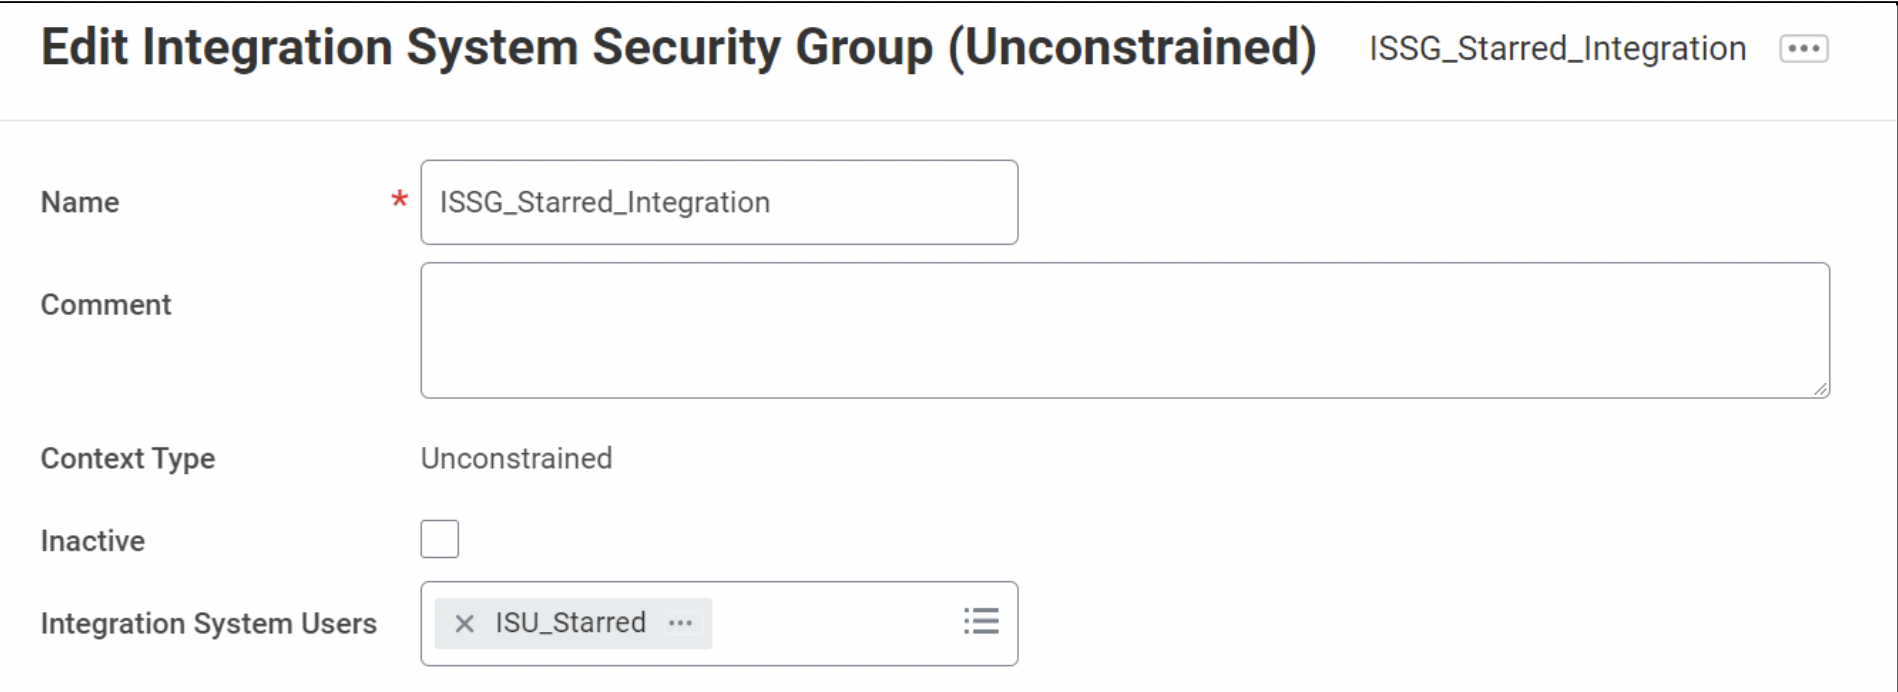
- On the next page titled Edit Integration System Security Group (Unconstrained):
- click on the box for Integration System Users
- search for “ISU_Starred” and select it
- click OK.
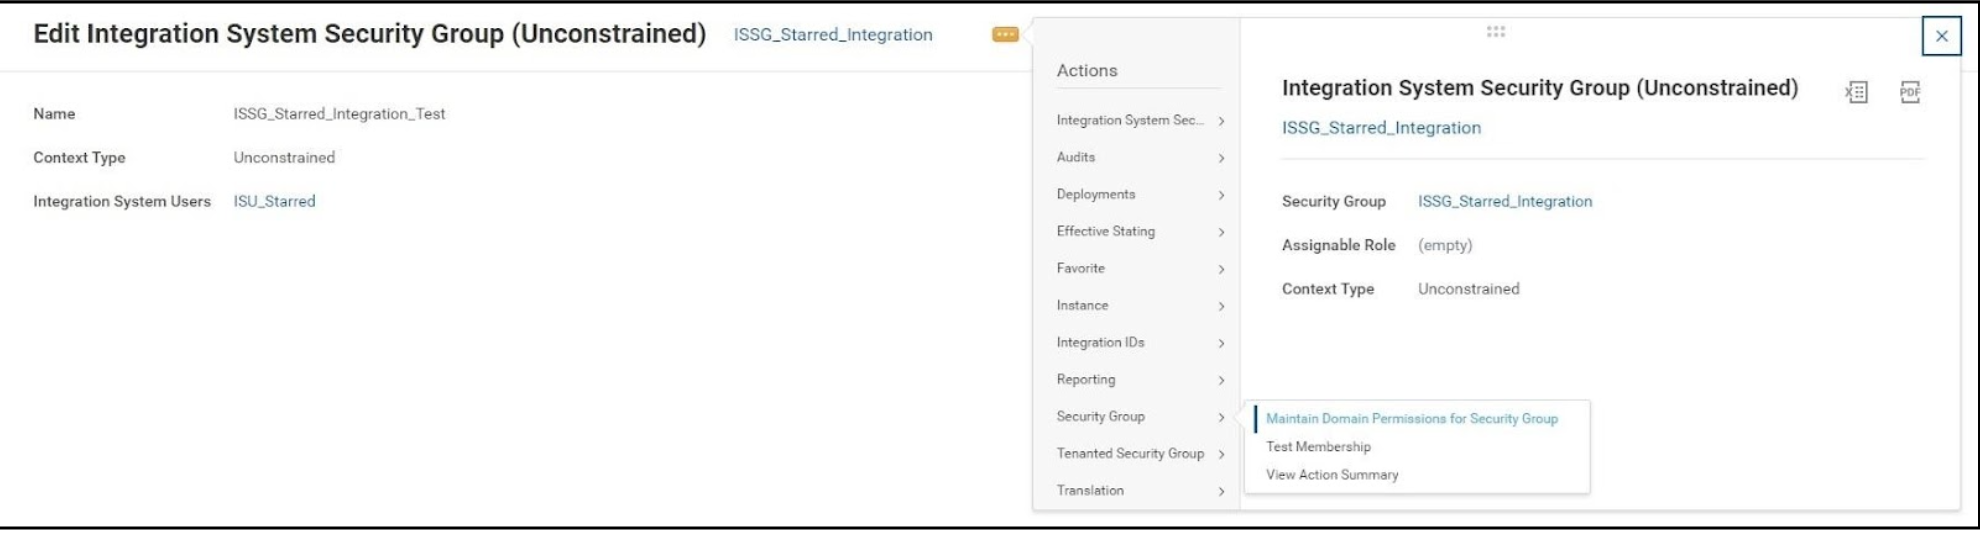
- Next:
- click on the three dots for the Security Group
- navigate to the option called Security Group
- click on Maintain Domain Permissions for Security Group.
- On the next page:
- fill the various domain security policies as per different operations: View/Modify Access / View access / Piut access / Get access as per the table below
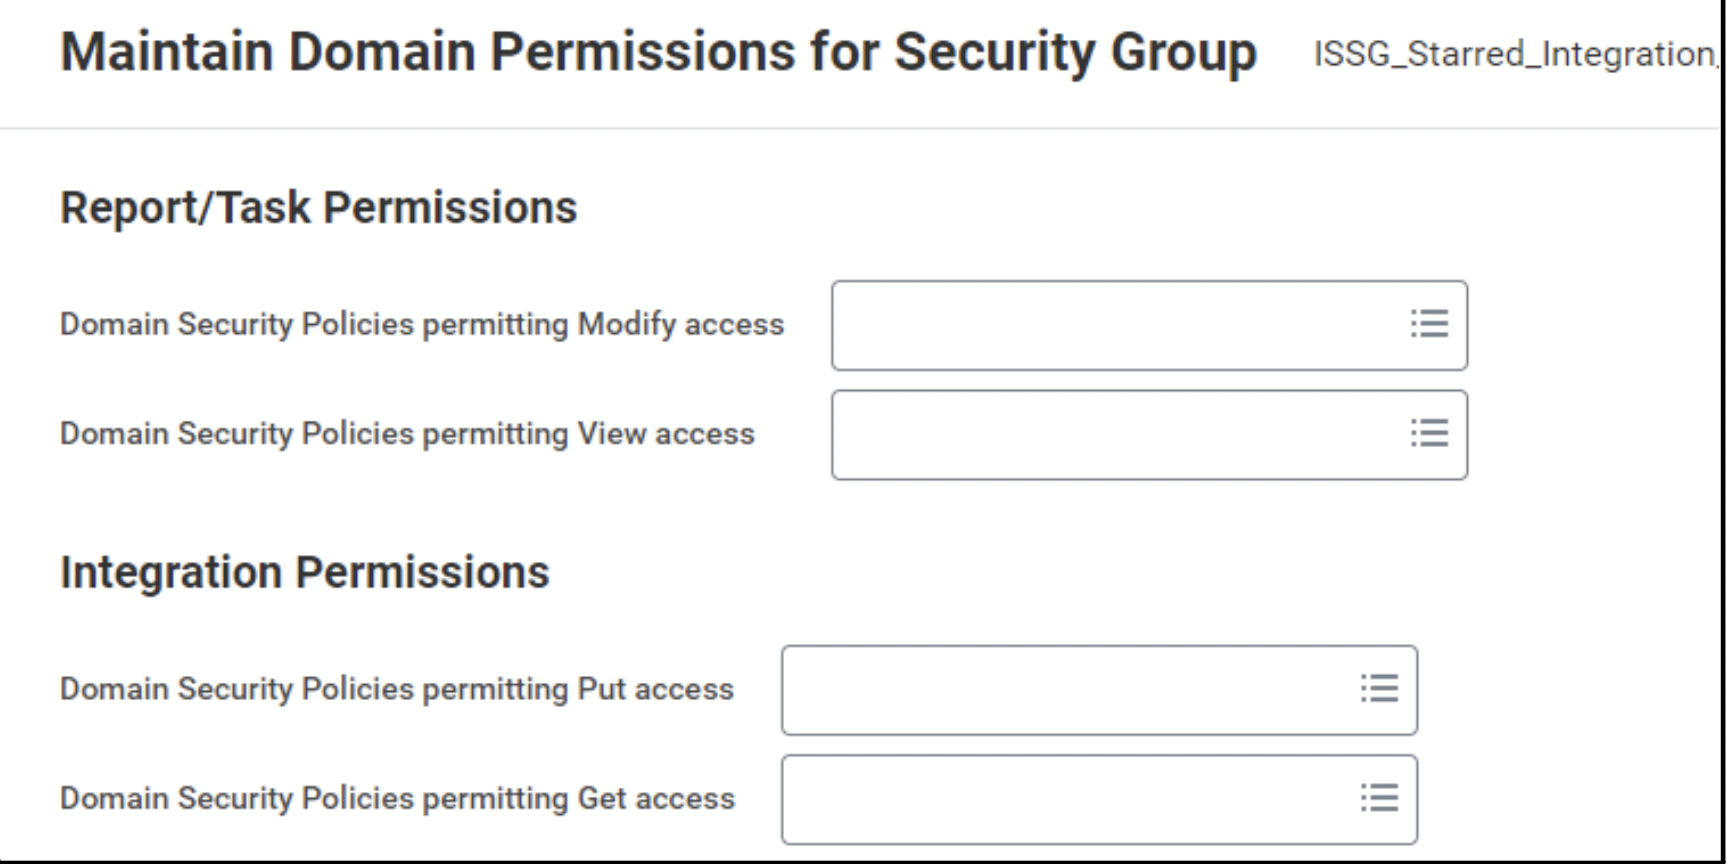
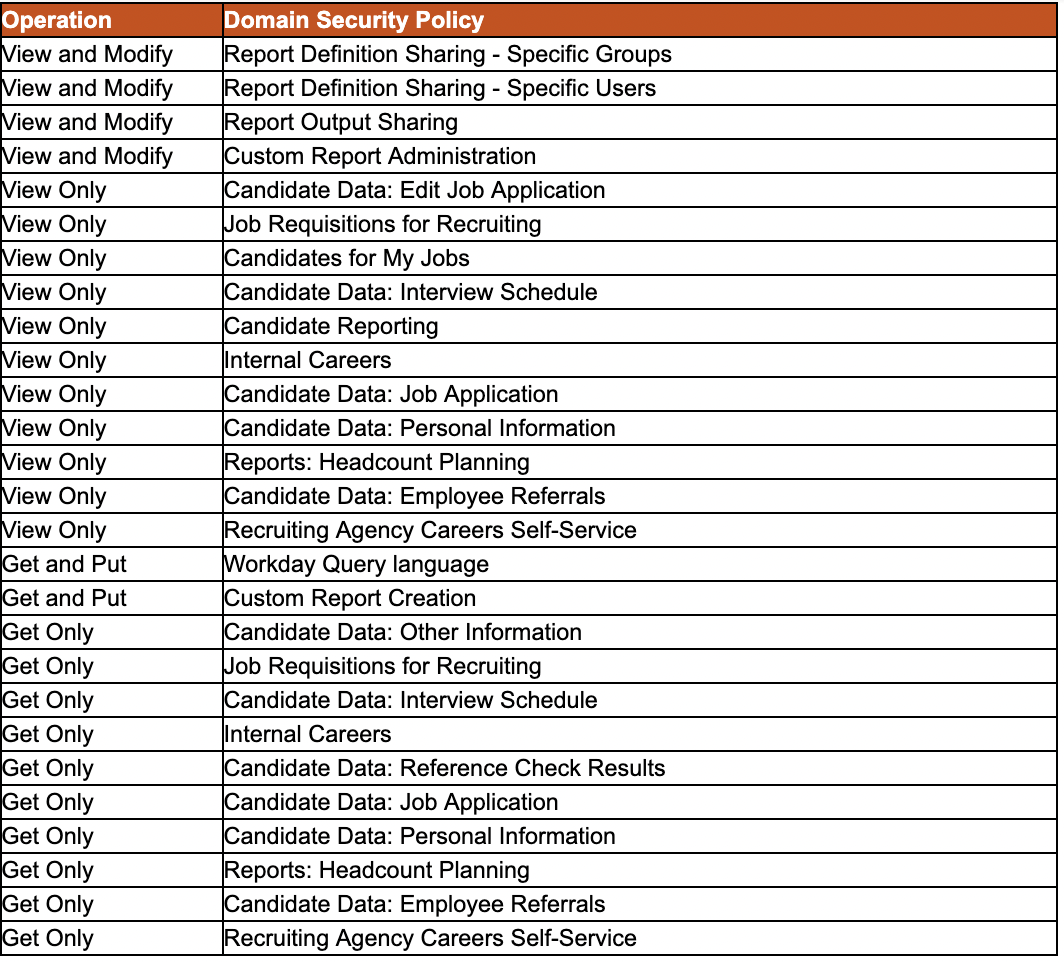
- Click OK and then Done.
C. Create Report Definition
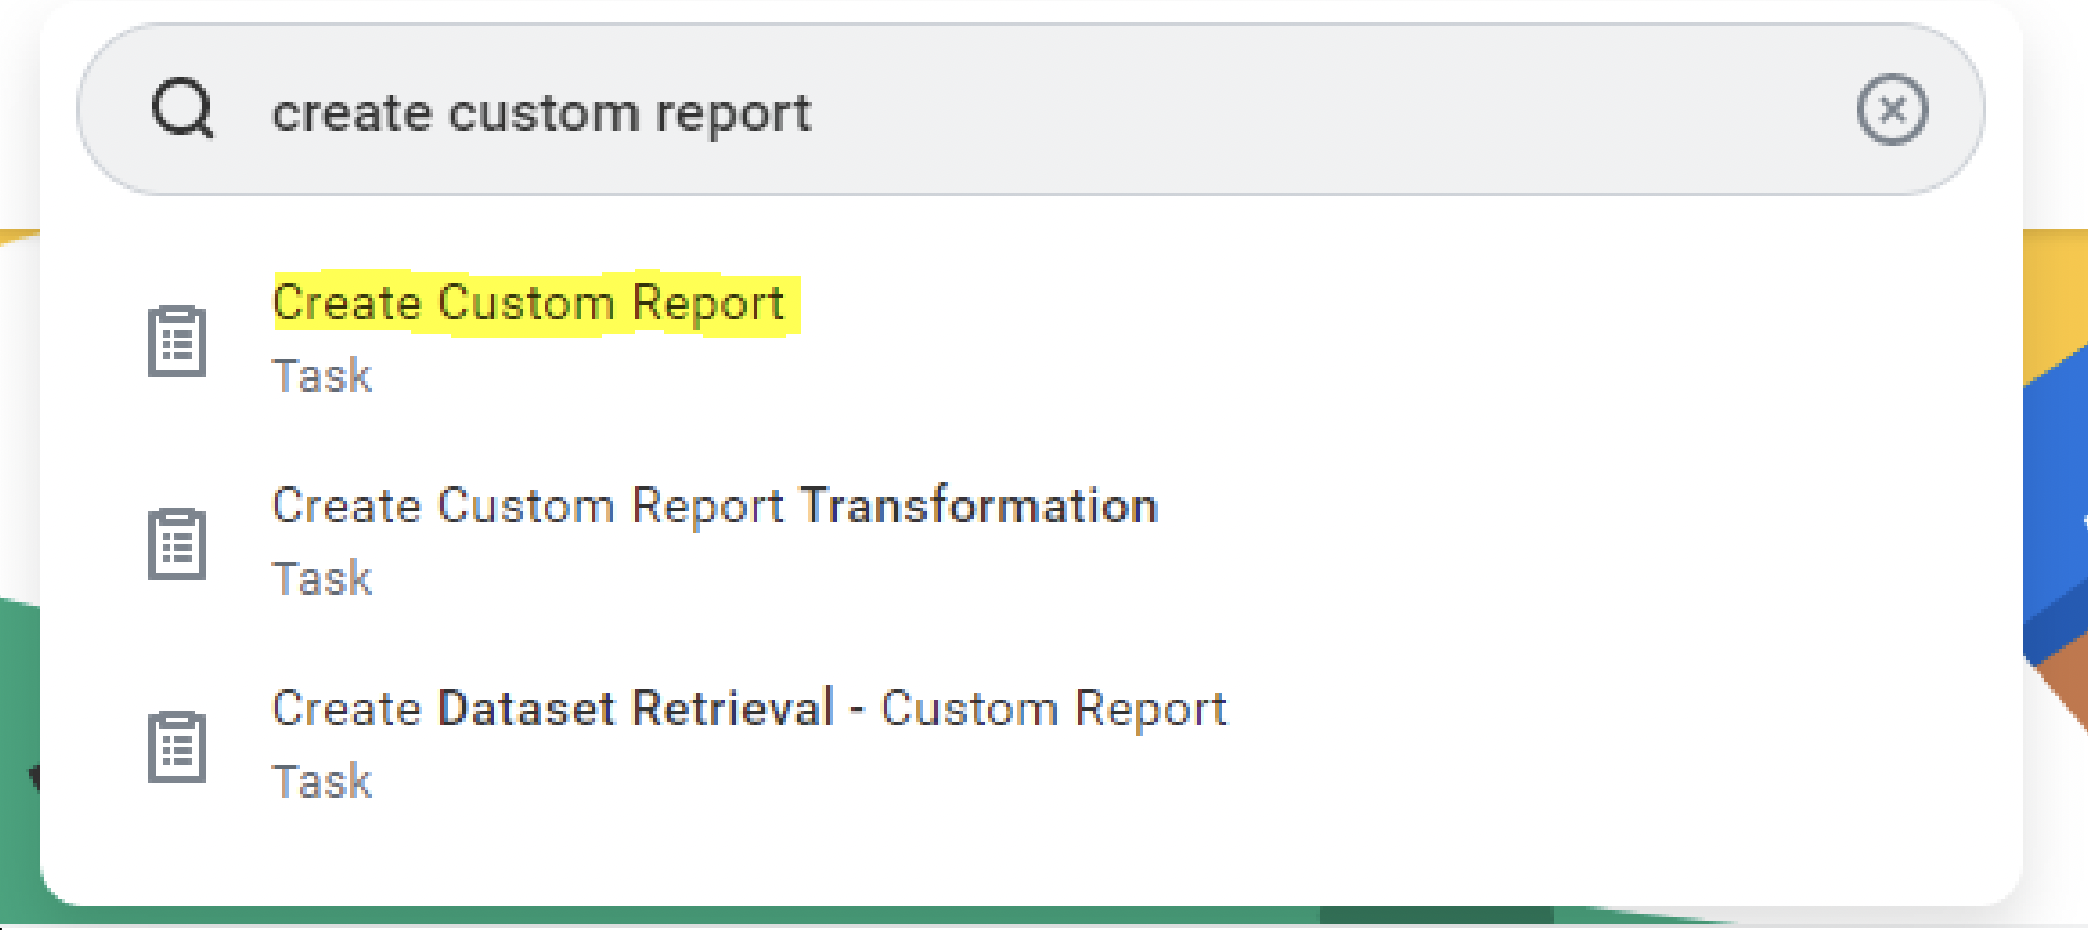
- Type Create Custom Report in the Search Box and select the option in the list.
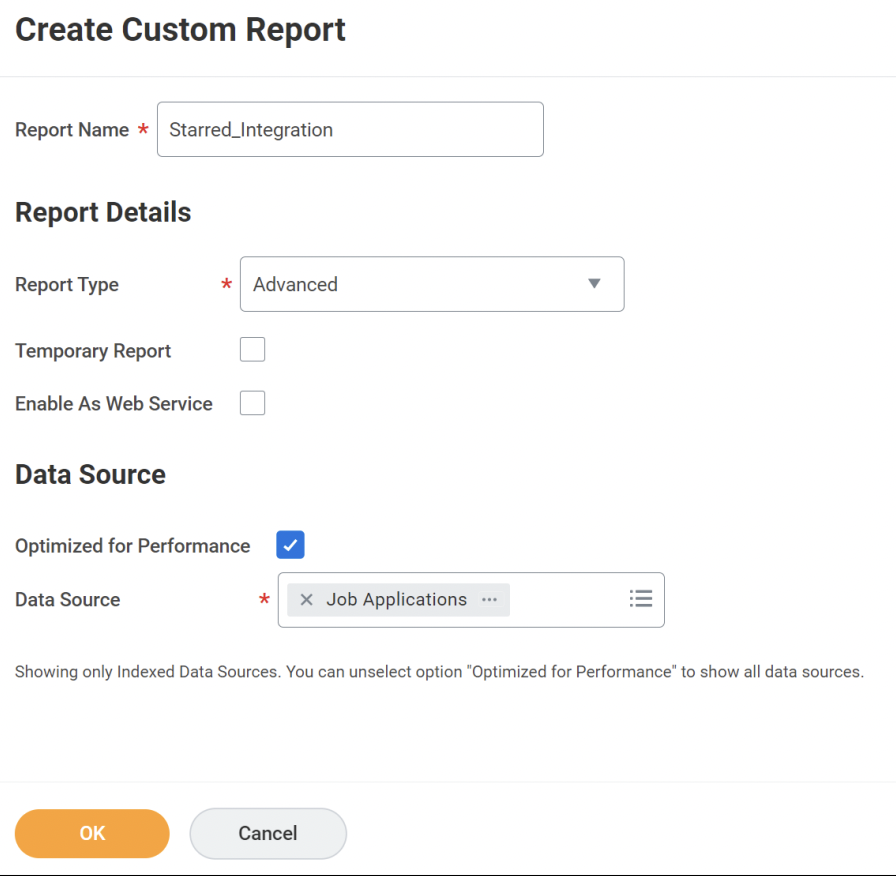
- Fill the various fields as follows.
- Check if the report name is exactly: ‘Starred_Integration’.
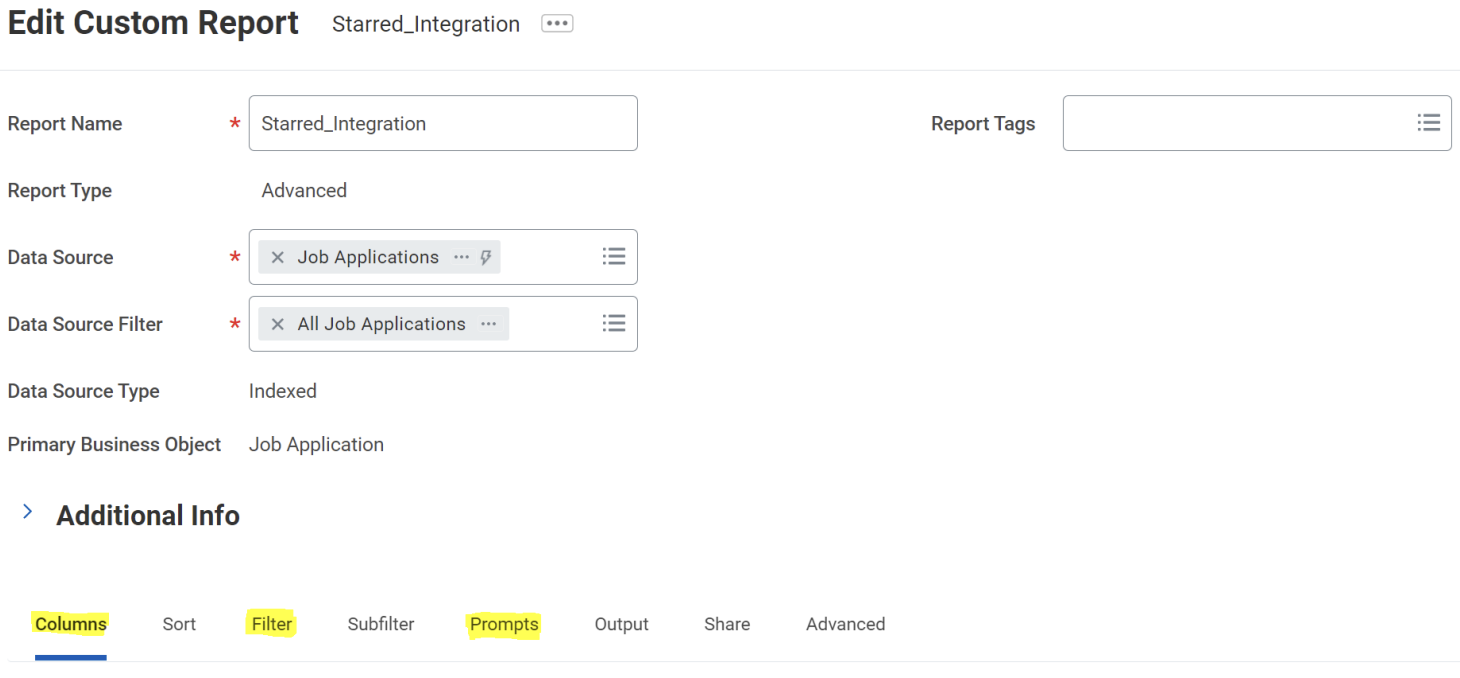
- On the next page:
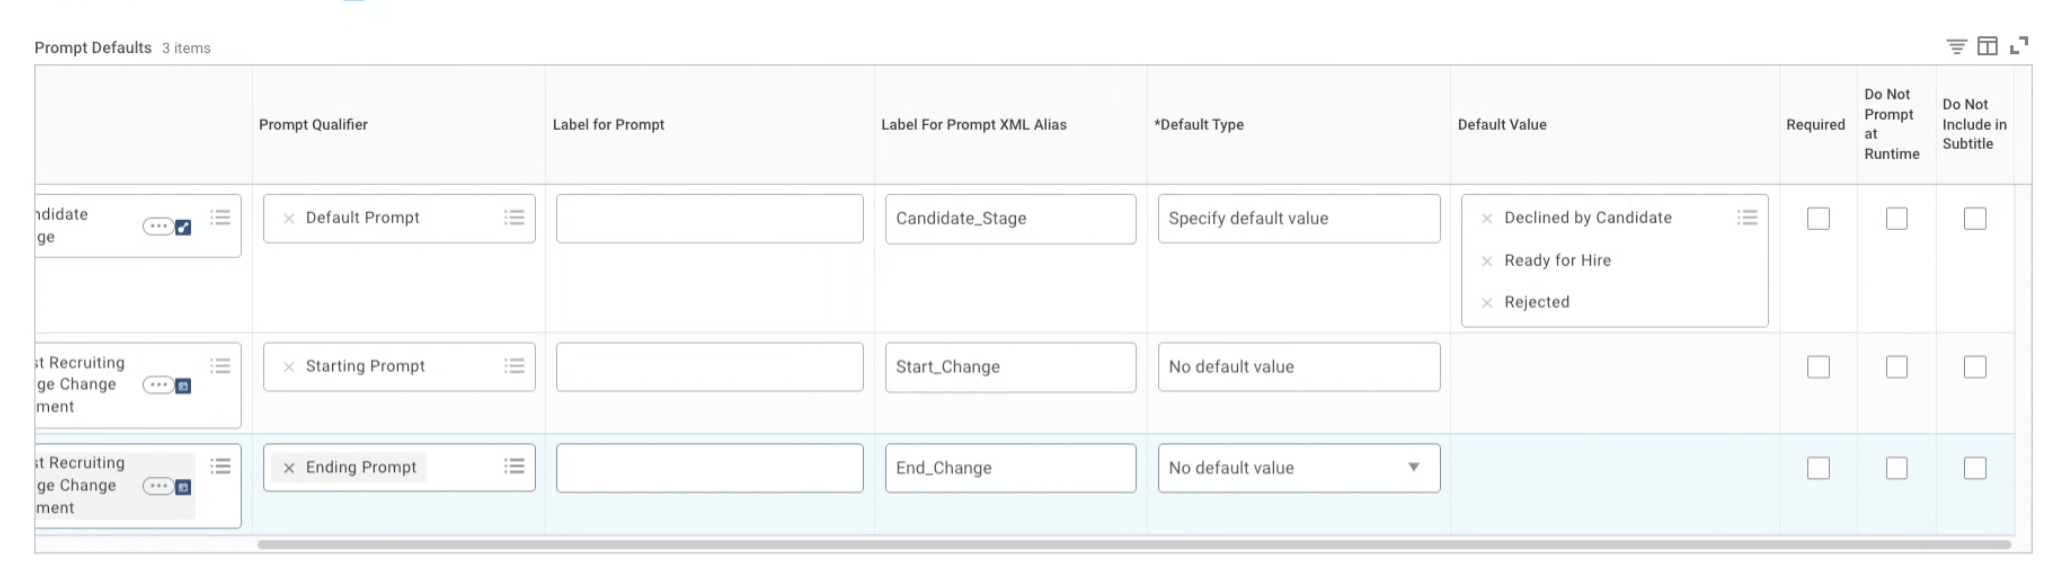
- fill in the details in tabs: Columns, Filter and Prompts as per the tables below.
Note: disable Do not prompt at runtime. See screenshot below.
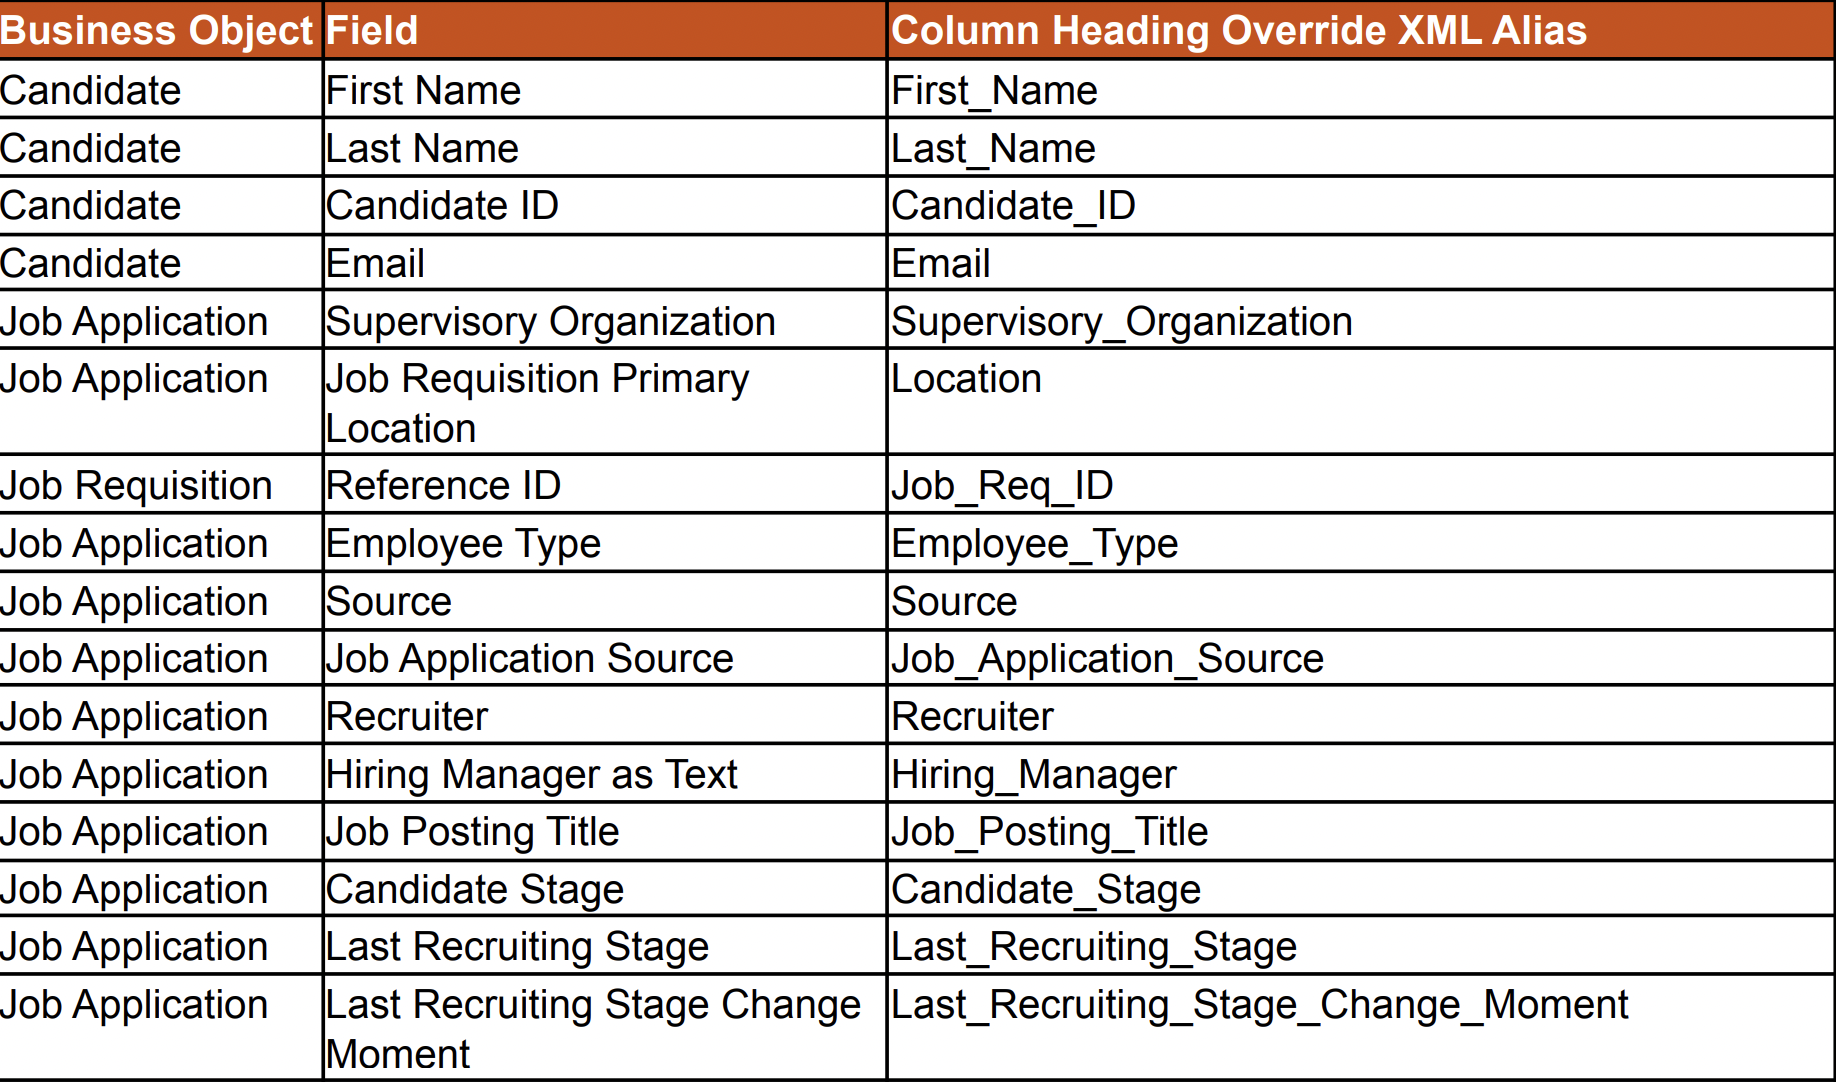
- Columns
Please note:
🌟 the order and the spelling of the columns needs to match exactly what you see in the table, including underscores and capital letters.
🌟 you can add any field to the report that you want to be able to pull. These extra columns can be added after the standard ones shown in the table.
🌟 you need to add more than one field under each Business Object in order to show in Starred.
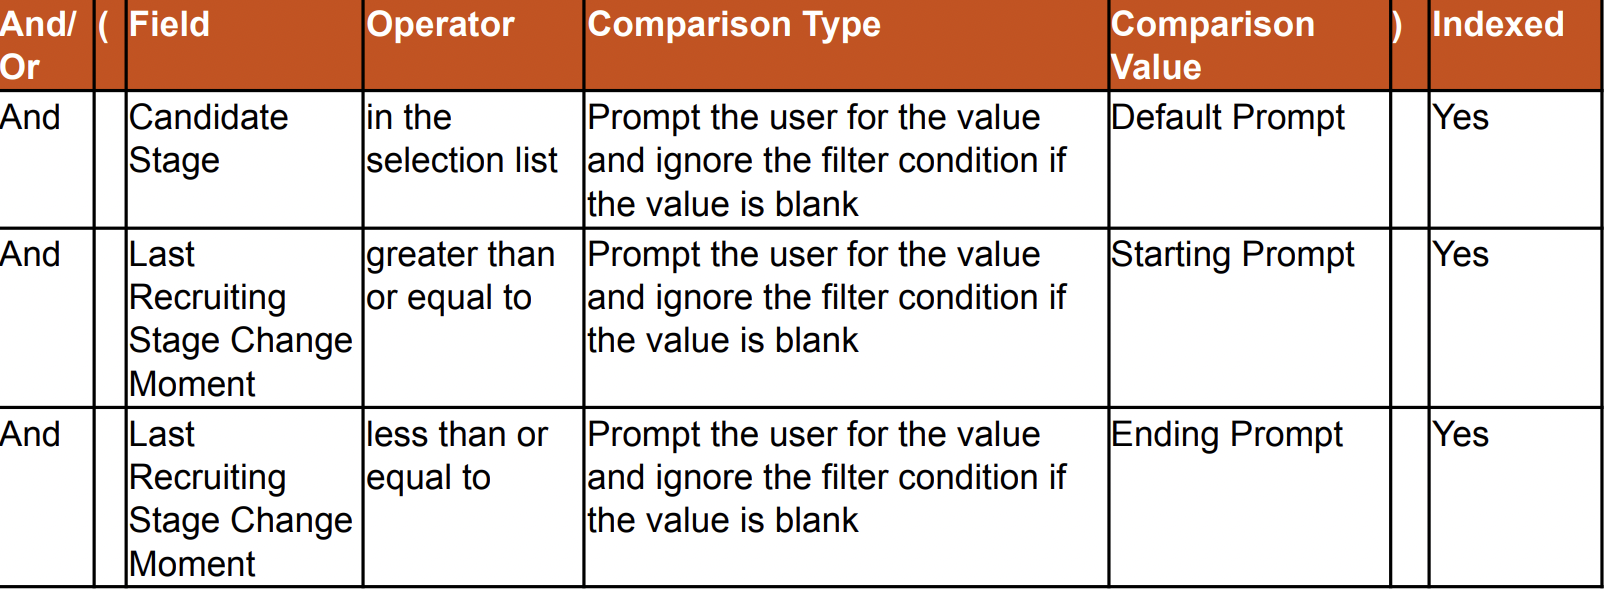
- Filters
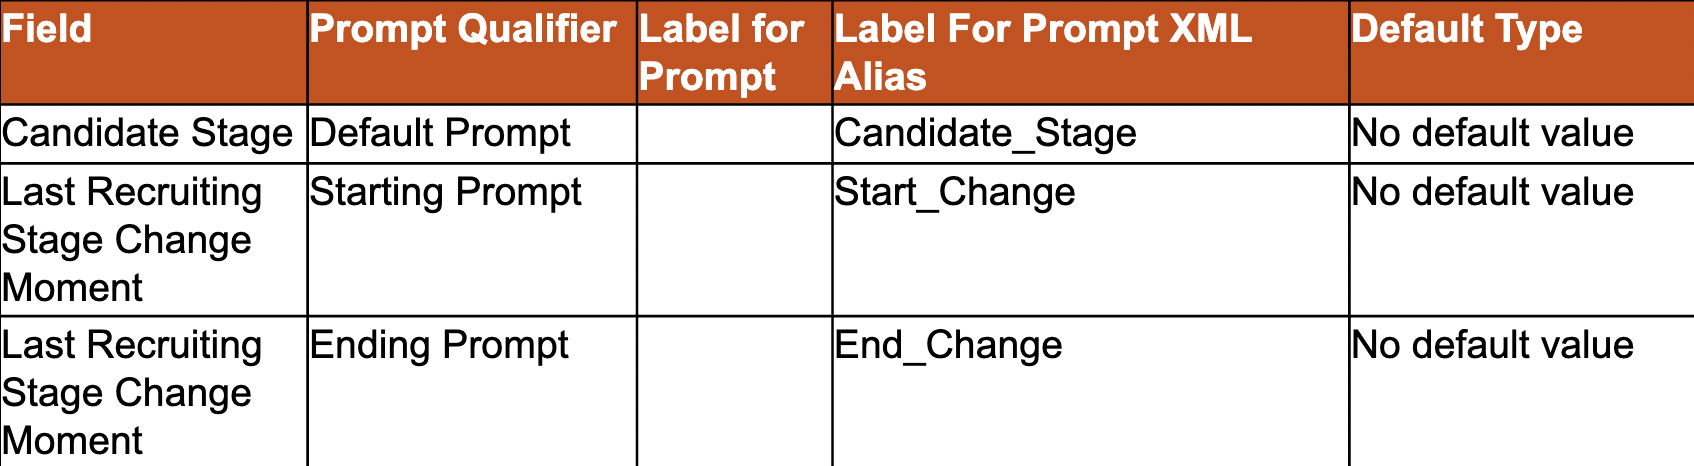
- Prompts
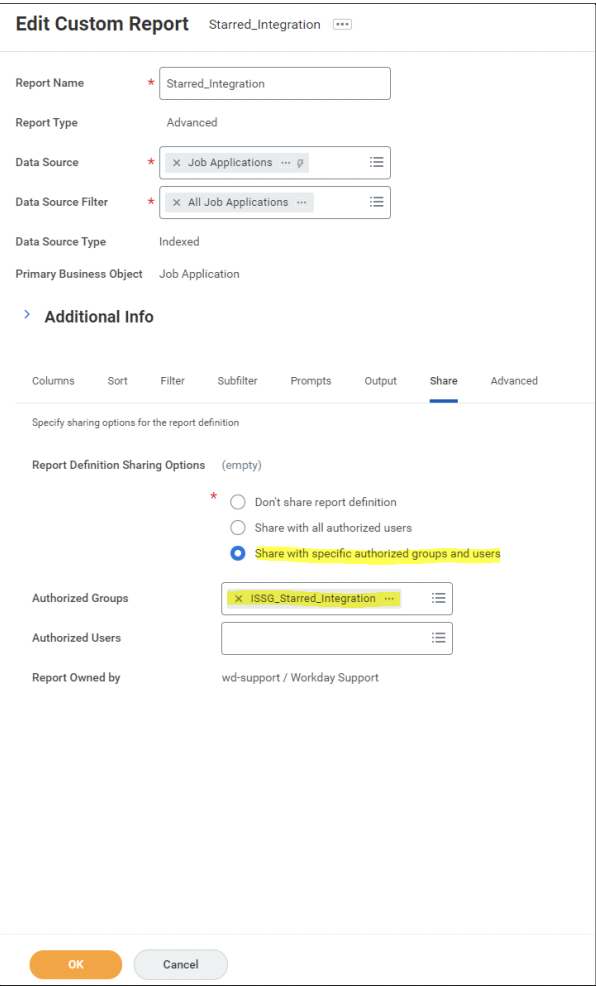
- For the Share tab:
- fill in the report sharing options (highlighted) as below
- click OK.
- On the next page:
- click Run (at the bottom) to run the report.
- fill in the report prompts
- click OK to validate the required information.
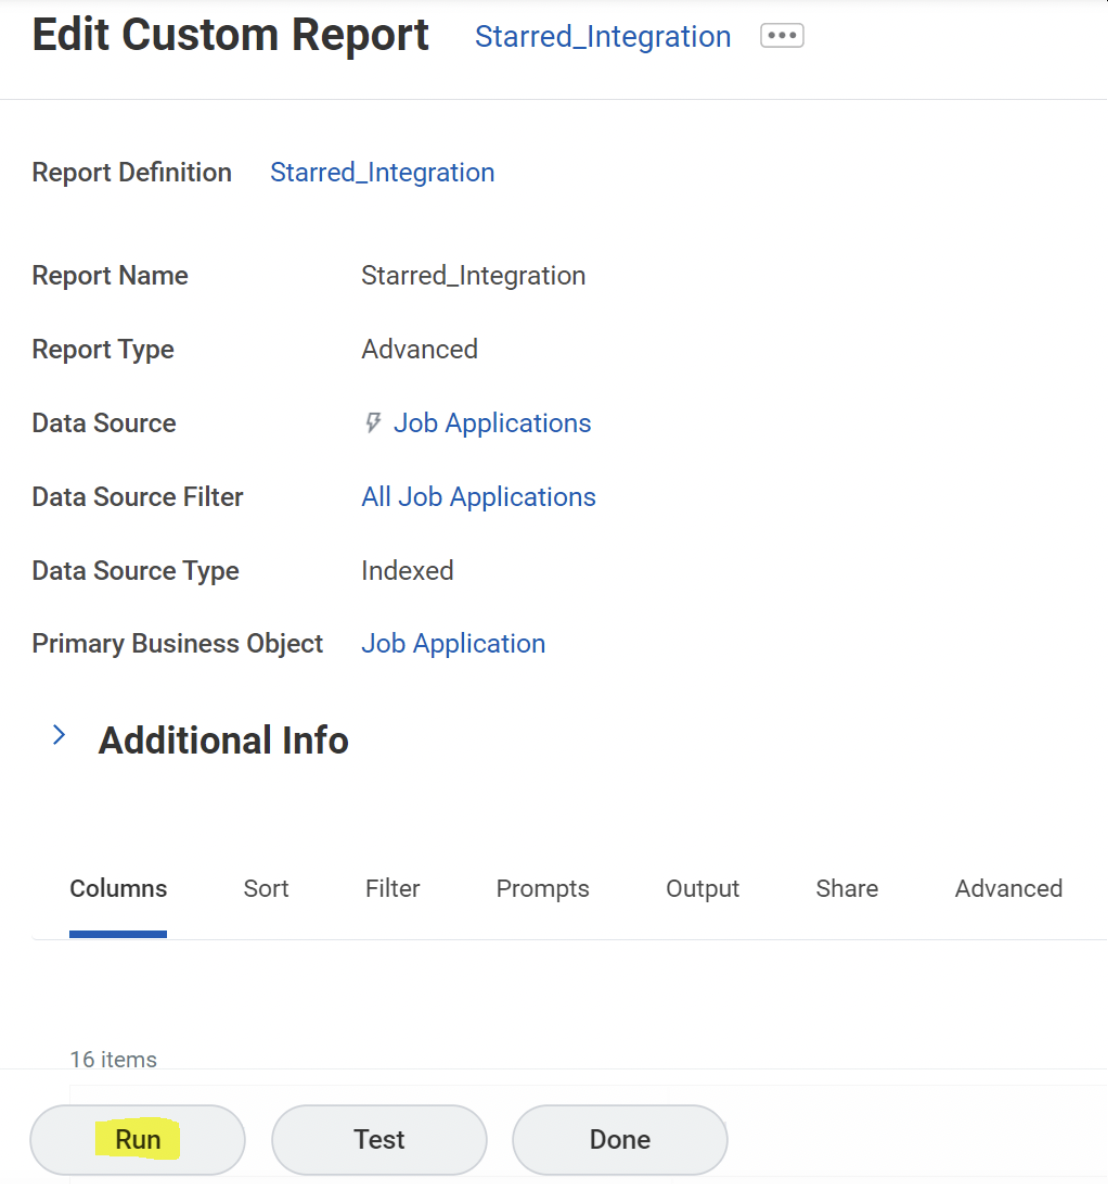
- After you've run your report once, you'll be able to copy the Report URL.
Updated 4 months ago
Learn More
Did this page help you?