Workday workflow testing
Now that you've added all steps to your workflow, it's time to start testing!
Workflow testing
1. Create a candidate in Workday linked to your own email address. Call the candidate "Test"
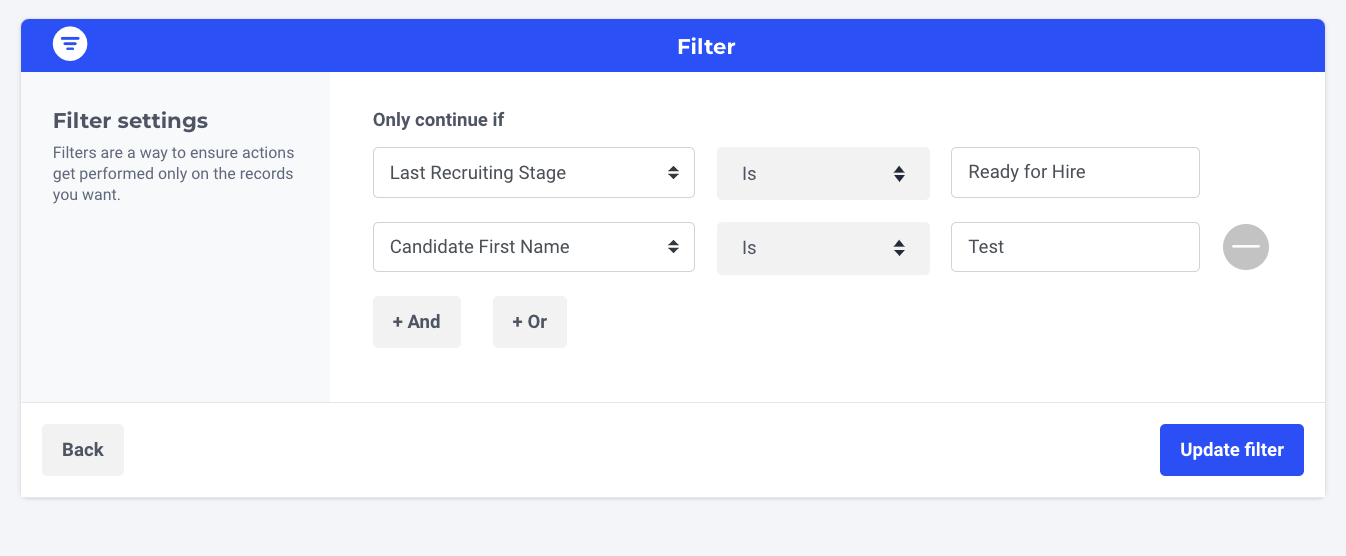
2. Add a secondary condition in the Filter step with the name or email address of the test applicant created in the previous step. Once you enable your workflow, the workflow will only trigger for this specific candidate name or email address.
3. Click on 'Update trigger' and then 'Save workflow'
4. Ensure that your cooling down period is switched off (in case you'd like to test more than 1 workflow)
5. Enable the workflow
6. Depending on the workflow you want to test, you can now reject or hire the test applicant in your Workday environment.
Please note:
- If you've added other conditions at the Filter step, make sure that the test candidate you're using also meets those conditions.
- For security purposes, a candidate can only trigger the same workflow once. If you'd like to test out the same workflow multiple times, please ensure to create a new test candidate in Workday or duplicate the workflow and enable the copy to continue.
7. Navigate to Logs to check if the workflow has been triggered successfully. If there is no log available the workflow hasn't been triggered. Please contact your Customer Success Manager or use the chat for extra support.
Updated 10 months ago