Step 4. Action - Send or Schedule invitations
In this step you can set up all settings for sending your Starred invitations for feedback
Your final workflow step consists of settings up your survey invitation settings.
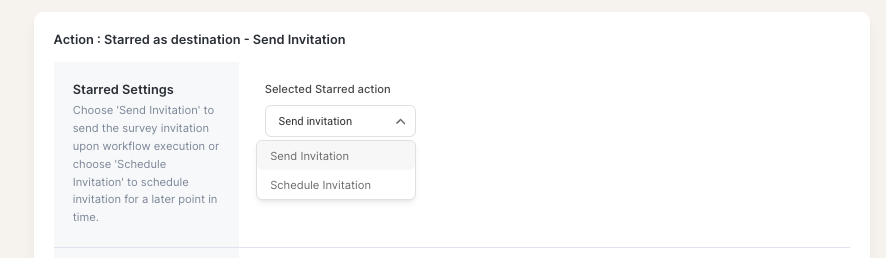
Send or schedule invitation
You can choose between two options:
- Send invitation - to send the survey upon workflow execution or;
- Schedule invitation - to schedule an invitation. We recommend choosing for a static delay period, here you can select a delay up to 180 days.
Choose Survey and Invitation Templates
In the step Starred Survey Template you can select the survey you would like to send to your respondents.

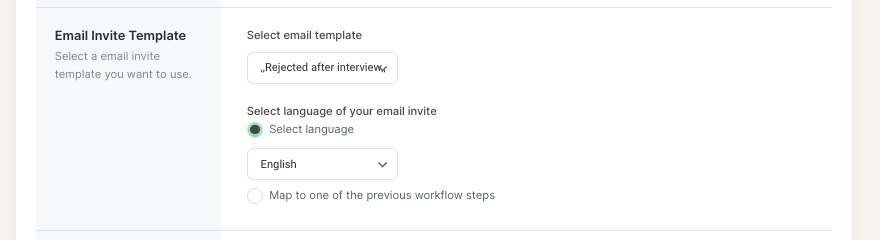
In the next step, Email Invite Template, you need to select the invitation template and language you would like to accompany your survey.
Sender settings
Under Sender Settings you specify the sender of the surveys. You can choose the email address of one of your colleagues or you can choose an alias sender address.
The difference here is that the "colleague's" address needs to be an active user in Starred, so it also needs to have an actual inbox, while the sender address is an alias email address that you can create in your Settings and that doesn't actually exist. We recommend this option as it's more future proof, as you might delete users from the account

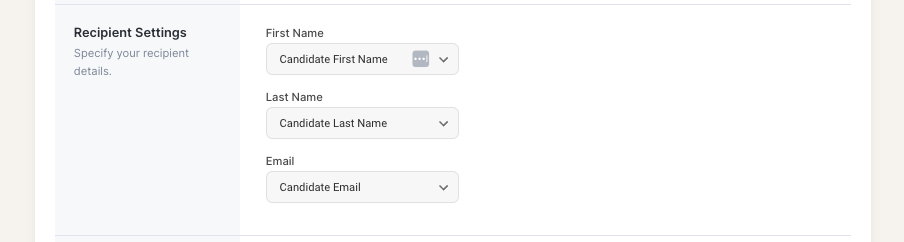
Recipient settings
In Recipient Settings you can select the recipient information. First Name, Last Name and Email are mandatory fields.
Custom fields
In Custom fields you can set up custom fields to segment your data in your dashboard after receiving responses. On the right you can select a field from your Successfactors environment, on the left you can specify the name of this custom field. We recommend adding the specified name without spaces as these fields can also be used to customize your invitation text with.

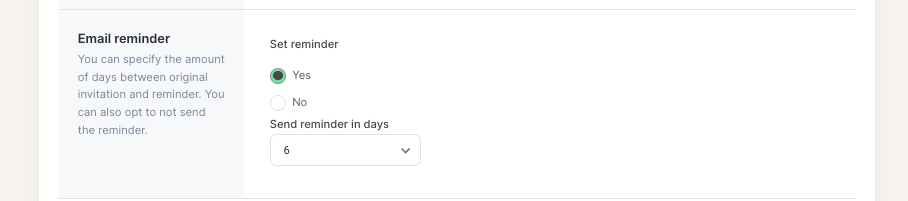
Email reminder
At Email reminder you can set a reminder. If the recipient doesn’t respond to the feedback survey, we will send a friendly reminder X days after the initial invitation. The text in the reminders is not customizable, meaning it is the same as the initial email just with a slightly different subject.
Tips & Tricks
- When choosing the number of days delay in sending the survey, keep in mind the number of days delay used for sending your rejection emails. The delay in Starred is based on the rejection date in Workable, not based on when your rejection email is sent from Successfactors.
- Adding custom fields to received responses can be done but is extremely time consuming and should only be reserved for specific cases, as it cannot be done in bulk. For this reason, we recommend to add all custom fields before you enable your workflow. Removing custom fields from the workflow is possible at any time.
- Fields are case sensitive
- Type custom field names without spaces (e.g JobName)
- When using the same Custom fields in multiple workflows, the notations (capital sensitive!) should be the exact same to facilitate the comparison of data.
Workflow A: JobName =
Workflow B: Jobname = this is wrong! Use: JobName- Please note: the order you add fields to the workflows also matches the order in which the fields are displayed in CSV exports when you download your responses.
Updated 11 months ago