How to connect SAP SuccessFactors with Starred
Connect your SAP Successfactors environment to Starred to automatically trigger feedback surveys
User requirementsWe recommend an Admin user to do the integration. The Admin user requires the following permissions to set up the integration:
- Use the OAuth data API (get user access tokens)
- Read the following OData API entities: Candidate, CandidateProfileExtension, JobApplication, JobRequisition
- Get OData API metadata for the following entities:
- OData API Application Export
- OData API Candidate Export
- OData API Job Requisition Export
- OData API Application Audit Export
- If CandidateProfileExtensions is enabled:
MDF Recruiting Permissions CandidateProfileExtension View
MDF Recruiting Permissions CandidateProfileExtension Import/Export
Please Note: It is currently not possible to trigger Candidate Applied survey as the SuccessFactors integration does not work for this specific stage. The integration requires that the candidate changes stage, which does not happen when they apply in the SuccessFactors environment.
Set up the integration with Starred and SAP SuccessFactors
The integration consists of several steps.
1. Register an OAuth Client Application
Follow the instructions on the SAP Help Portal to register an OAuth Client Application on your SAP SuccessFactors instance. You will need the private key (private.pem) and the generated API Key in the next step.
Good to knowApplication URL: as stated in the SAP SuccessFactors documentation the URL is not currently supported, however you may enter “https://connect.starred.com”
2. Connect SAP SuccessFactors
- Access the Integrations section in Starred.
- Now click on Connect in the ATS overview to connect with SAP SuccessFactors
- Fill in the following fields:
| Field | Explanation |
|---|---|
| API Server | You can lookup the API Server for your data center in this list |
| CompanyID | If you need help in finding your CompanyID read this article |
| Username | The username of a SuccessFactors user that will be associated with the api calls. We recommend creating a dedicated api user for this integration. This user must have the appropriate permissions. |
| API Key | The API Key generated in the previous step |
| Private key | The contents of the private key from the key-pair used in the previous step including -----BEGIN PRIVATE KEY----- and -----END PRIVATE KEY----- delimiters.If the private key begins with -----BEGIN ENCRYPTED PRIVATE KEY----- the private key is encrypted, which is not supported. See SAP Help Portal to create new private key. |
- Click Connect.
- On the next page, Starred will display username, password and REST API URLs. Please save them because you will need them in the next step.
3. Import the Integration Center Definition templates
Download the .icd template files, and upload them as described on the SAP Help Portal starting at step 2.
There are 3 templates, one for each trigger type:
Verify the "Destination Settings" and make sure the REST Server and the Operation URI match the values stored in the previous step. We recommend to create a single REST destination setting and reference it from all 3 integration definitions.
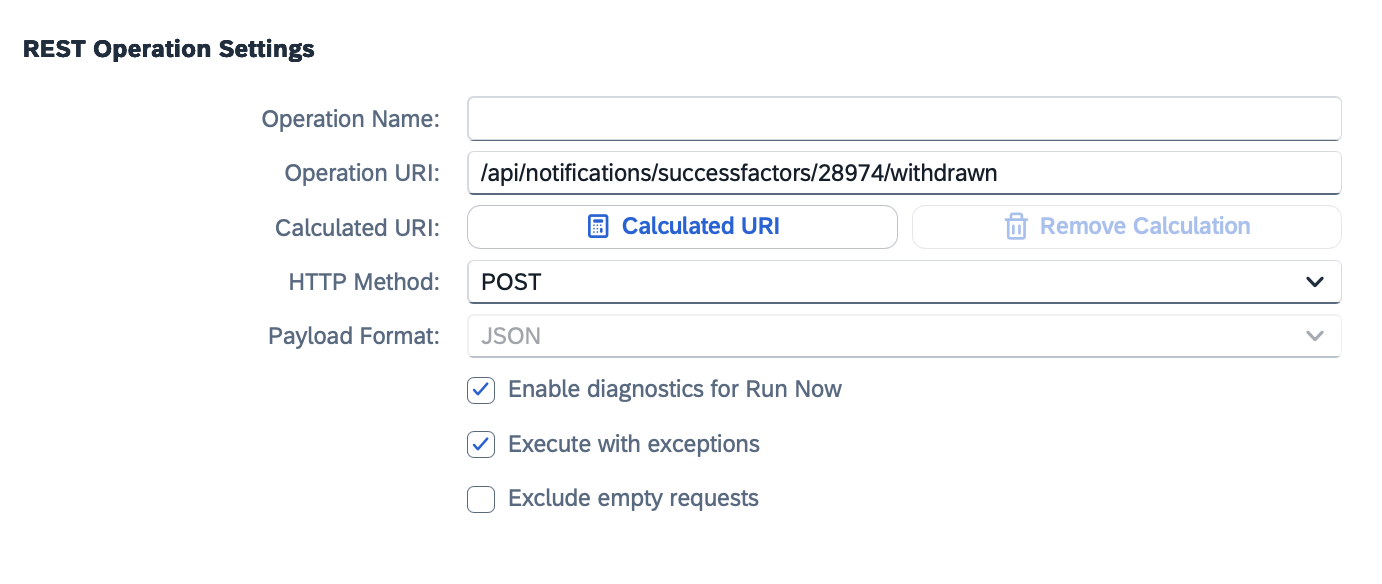
Make sure the operation URL in the REST Operation Settings follows the format shown below. The number in the URL should match your company ID. If you're unsure what your company ID is, please reach out to support or your Customer Success Manager.
4. Trigger the integrations in Intelligent Services Center
The next step is to configure the integrations to be triggered when a Job Application Status is changed.
- Open the Intelligent Service Center
- Search and click the "Update of Job Application Status" event in the list
- In the right pane under "Custom Activities", click "Integration". This will open a popup which should display the 3 integrations created in the previous step.
- Add each integration and click "Save Flow" when done. You should see a message that the flow is saved and published successfully. To save, click on the 3 dots on the top right corner.

For more information see this SAP Knowledge Base Article.
The integration is now completed.
Extra tips for the configuration
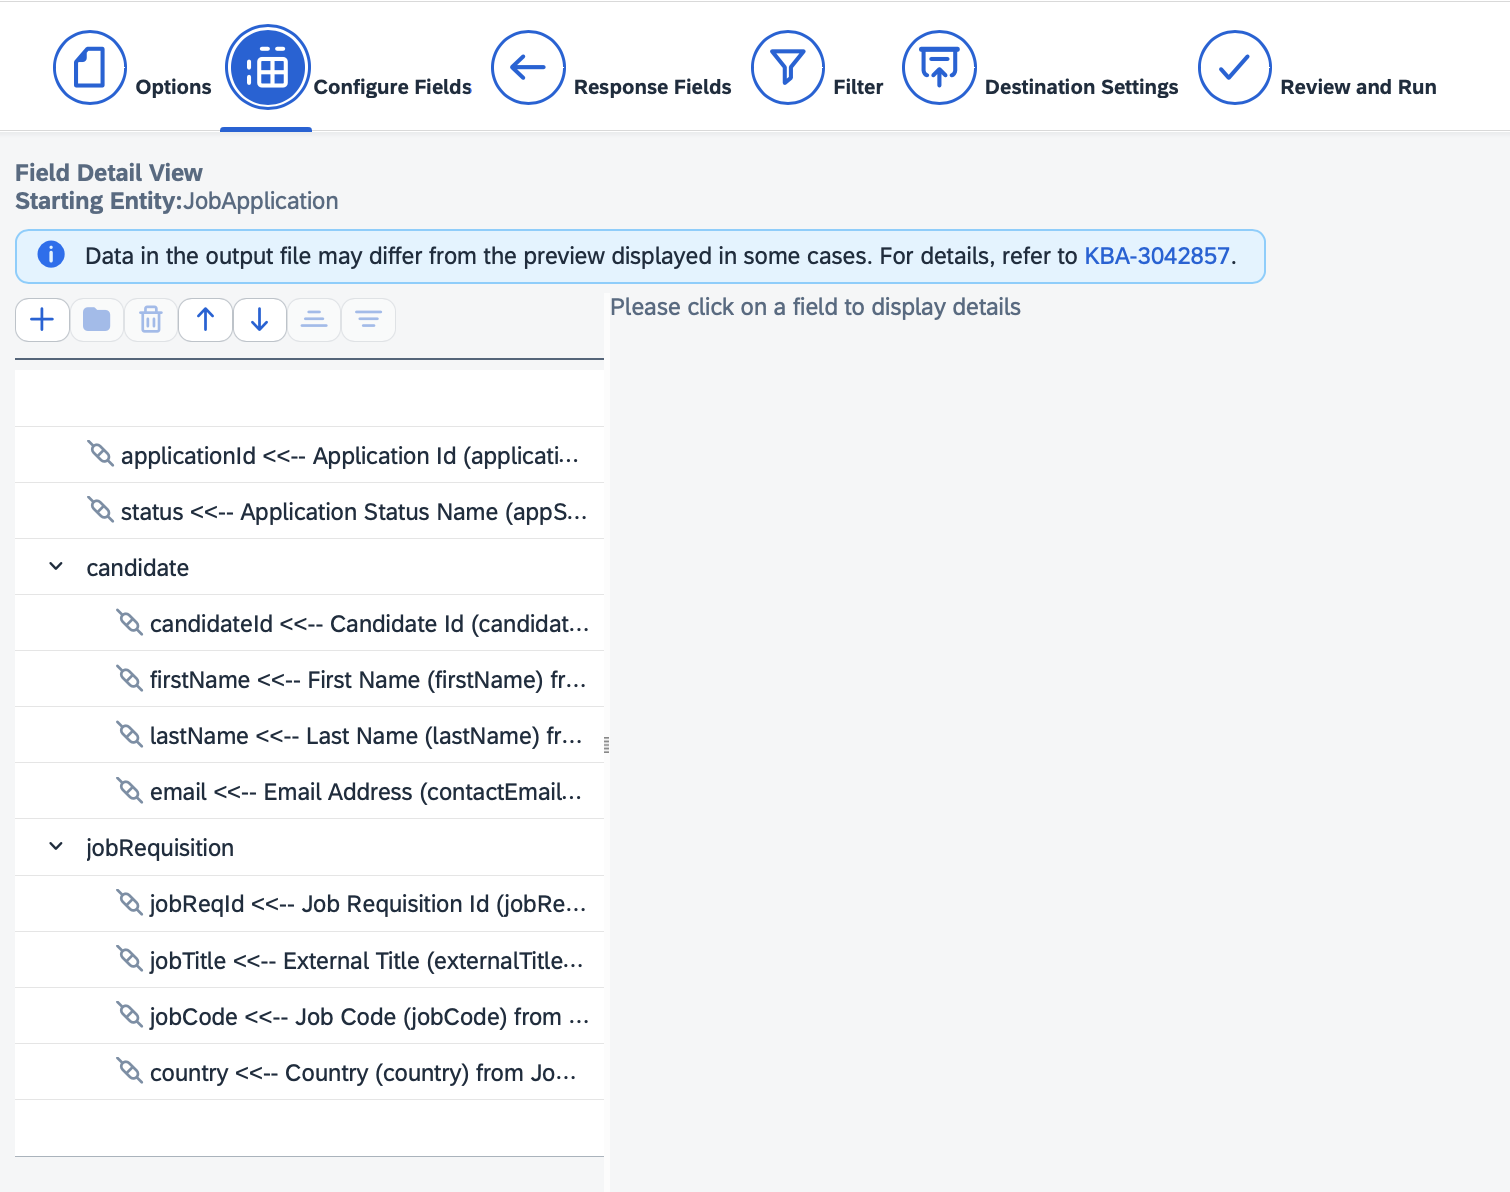
In the Configure Fields section of each integration within the Integration Center, add all the fields from your environment that you want to make visible in Starred. This will allow you to later filter and segment your data effectively.
In the Filter section of each integration, specify the statuses or status IDs that you want Starred to detect. For instance, to trigger a survey for rejected candidates, include all the rejected statuses used in your environment. You can apply the same approach to other types of fields and include multiple filters as needed.

Updated 9 months ago