How to save filters
Save time by creating filter sets to analyze your data
If you’re often using the same filters, Starred allows you to save them so you do not have to select them each time.
Please note: this feature is only available for users with the access rights “Can filter dashboards”. To grant a user this access right, head over to theColleagues section of your Starred account.
How to create saved filters
To create a new filter set, add your desired filters.
Once you're done, you can click on Create saved filter. You'll be prompted to give the filter a name. Then you can save it

Once your filter is saved, it will appear in a dropdown menu on the left side:

Updating a saved filter
Once you have created a filter, you can still make changes to it later on, such as changing a name or adding an extra layer to it by adding another filter to the set.
Change the filter name
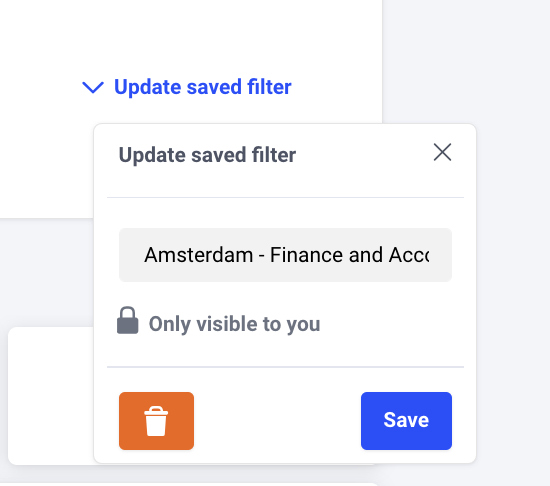
To change the filter name, click on Update saved filter, change the name and click Save:
Add or remove a filter
To add a filter, select your desired one from the list. If you wish to remove a filter, click on the X next to the it:

Once you're happy with your changes, click on Update saved filter and Save.
Deleting a saved filter
To delete a saved filter, click on Update saved filter and then click on the orange button with the bin:

🌟 Please note: saved filters are only available for your specific user profile so you'll be the only one seeing your specific filter sets.*
You can have multiple saved filters. To add a second one, you need to first delete the filters that you have applied and start from scratch, then save it regularly like you did the first time.
Updated 11 months ago