Setting up user roles (Candidate Experience)
Assign permissions based on user roles
From the Colleagues section of your Starred account, users can be assigned a role that manages their permission set.
Starred offers the following roles:
- Admin
- Recruiter
- Team lead
- Sourcer
- Recruitment Operations Manager
- Recruitment Coordination Manager
- Recruitment Marketeer
- Leadership
Editing user roles
For each user role, you can manage permissions and access rights in the Starred app to limit what the users assigned to that role can do.
To set up these permissions, from the Colleagues section you can click on Edit next to each user role.

You're able to:
- grant or limit access rights to Starred features, such as the ability to create surveys, to send invitations, or to edit colleagues.
- limit access to specific journey types.
- create Data Access Policies specific for that role.
- give access to your Bespoke Dashboard
- give access to sub-dashboards
Let's take a look at these features one by one.
User role access rights
With Starred, it's possible to limit the actions that users can perform on the platform on an individual level as well as on role level. If you do it on role level, each user added to that role will have the same access rights.

For more information on what each access right entails please refer to this support page.
Limiting access to specific journey types
By changing the settings in each user role, you are able to give users the rights to see all journey types or to select just the few that they should be allowed to view.

Data Access Policies on user role level
Like for the access rights, Starred allows you to create Data Access Policies for each user or to limit data access for specific user roles. Creating DAPs at user role level allows you to manage them in bulk, because these policies will be automatically applied to users when they are added or removed from roles

Example: You want to limit a recruiter to only seeing responses related to their candidates.
After ticking the box "Limit data access for this role" select on the left-hand side the field that you want to base your Data Access Policy on. We're choosing RecruiterApplication.
We then select "full name" from the right-hand side menu.

In this way, you are able to create a rule that when the recruiter name indicated in the application in your ATS (this field is retrieved from the workflow step "Action : Starred as destination - Send Invitation" in your integration) matches the full name of the user added to the recruiter role in Starred, then the results will appear in the dashboard for the user that is added to this recruiter role.
Bespoke Dashboard
You can choose whether users added to a specific role are allowed to view your Bespoke Dashboard or not by clicking the relevant box:

Sub-dashboards
Starred offers sub-dashboards with different types of insights compared to your survey dashboards. First things first, sub-dashboards present insights in an aggregated way.
You can assign these dashboards to any role within Starred just by flagging the sub-dashboards you want each role to have access to:
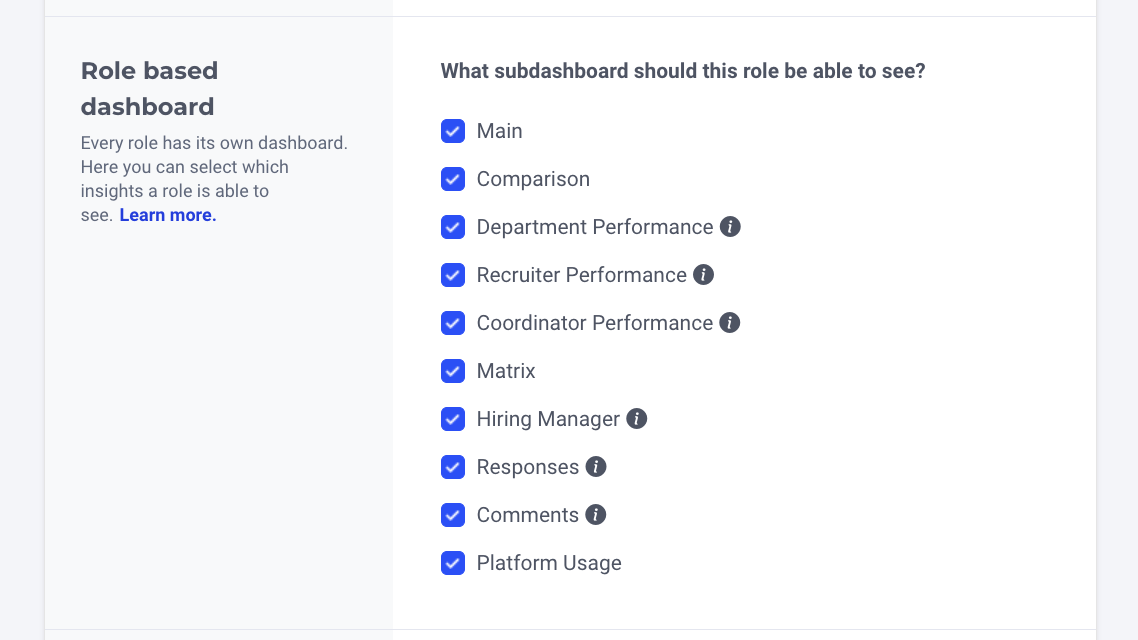
You can learn more about role-dashboards here.
Updated 10 months ago
If you want to add Data Access Policies for single users, check out our next guide: